
The Emisar D3AA 5700K flashlight can run 14500 and 1.5V cells and makes use of the favored Andúril consumer interface. There are lots of choices such because the stainless bezel.
Official Specs and Options
Right here’s a hyperlink to the Emisar D3AA 5700K flashlight product web page.
Variations
There are a bunch of choices!
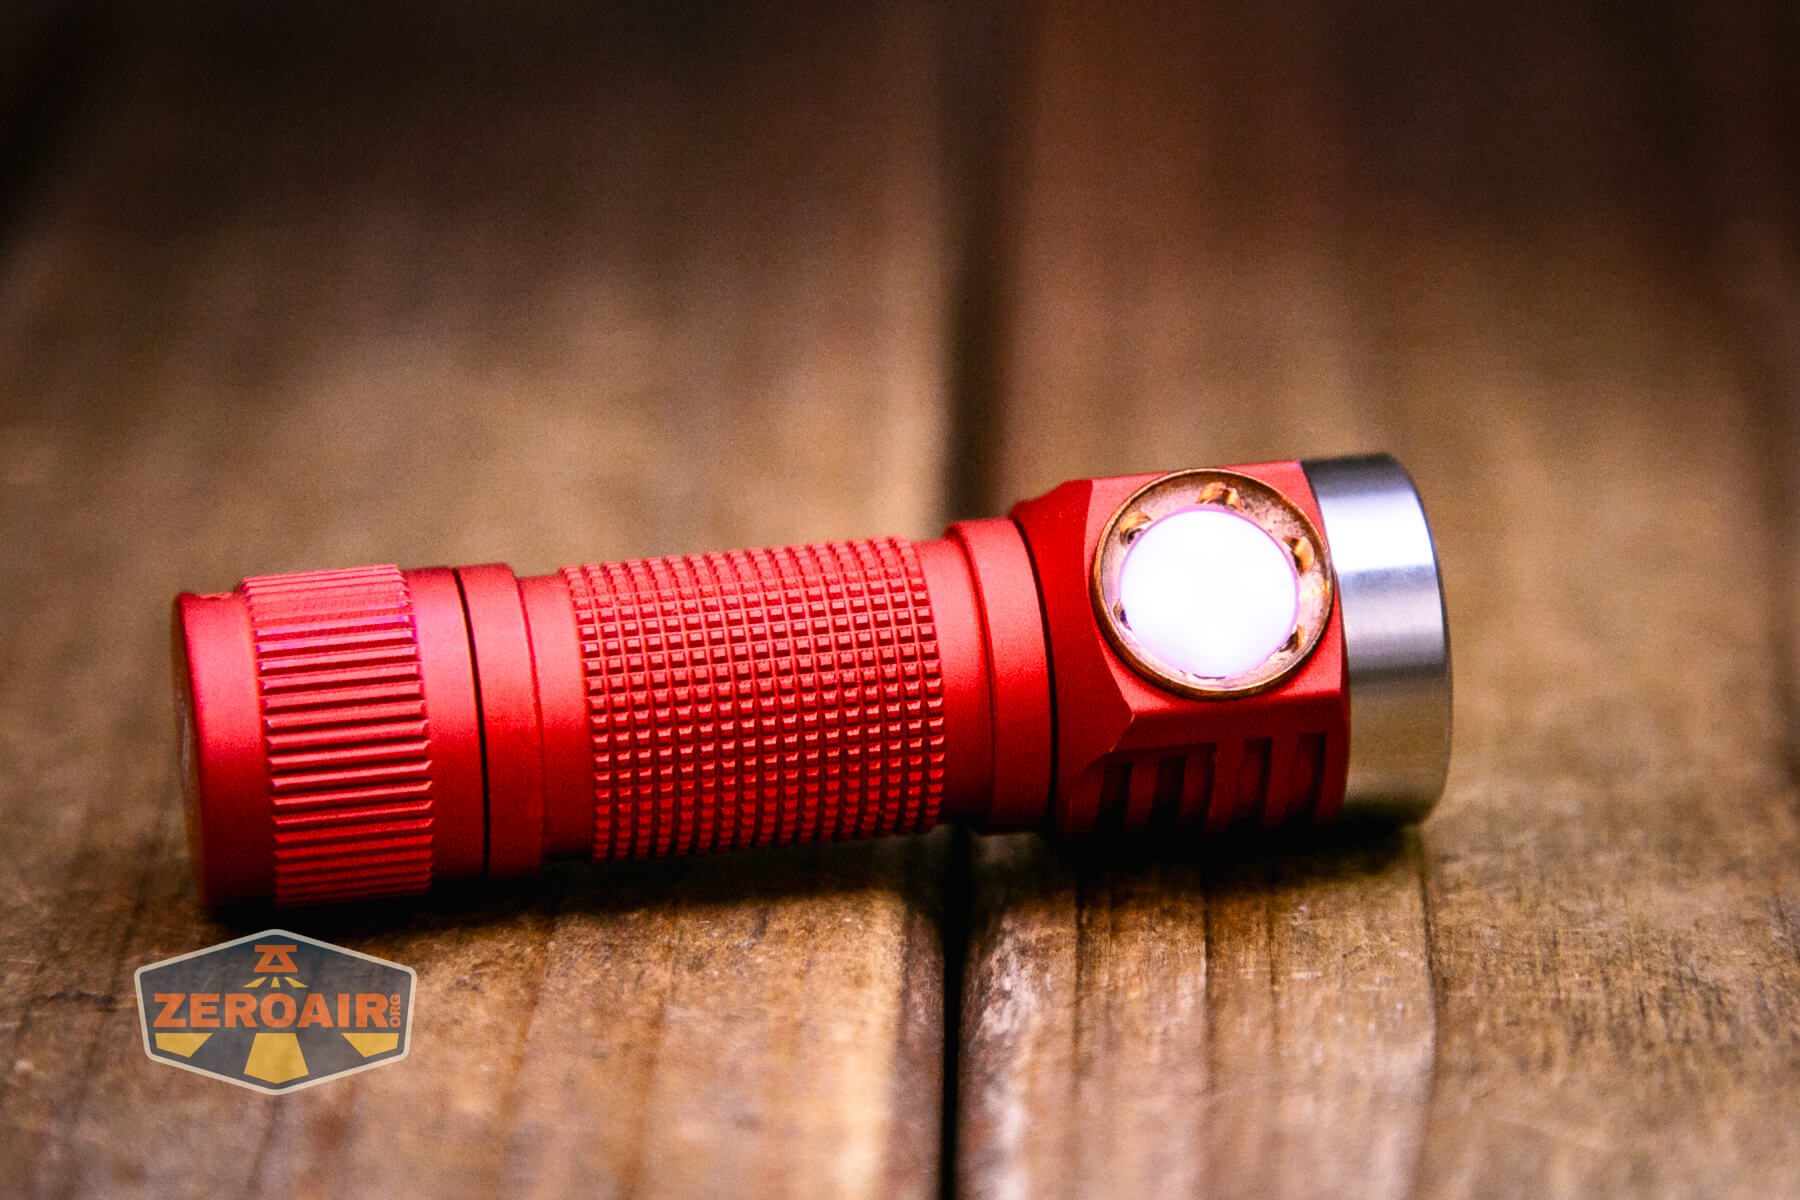
First is aluminum, which is available in purple (seen right here), black, darkish grey, and cyan. Additionally obtainable is titanium, which has a copper engine part. Lastly, there’s even a particular completed model of titanium: Uncooked Ore, Clouds, Crinkle, Cyclone, and Oil Slick.
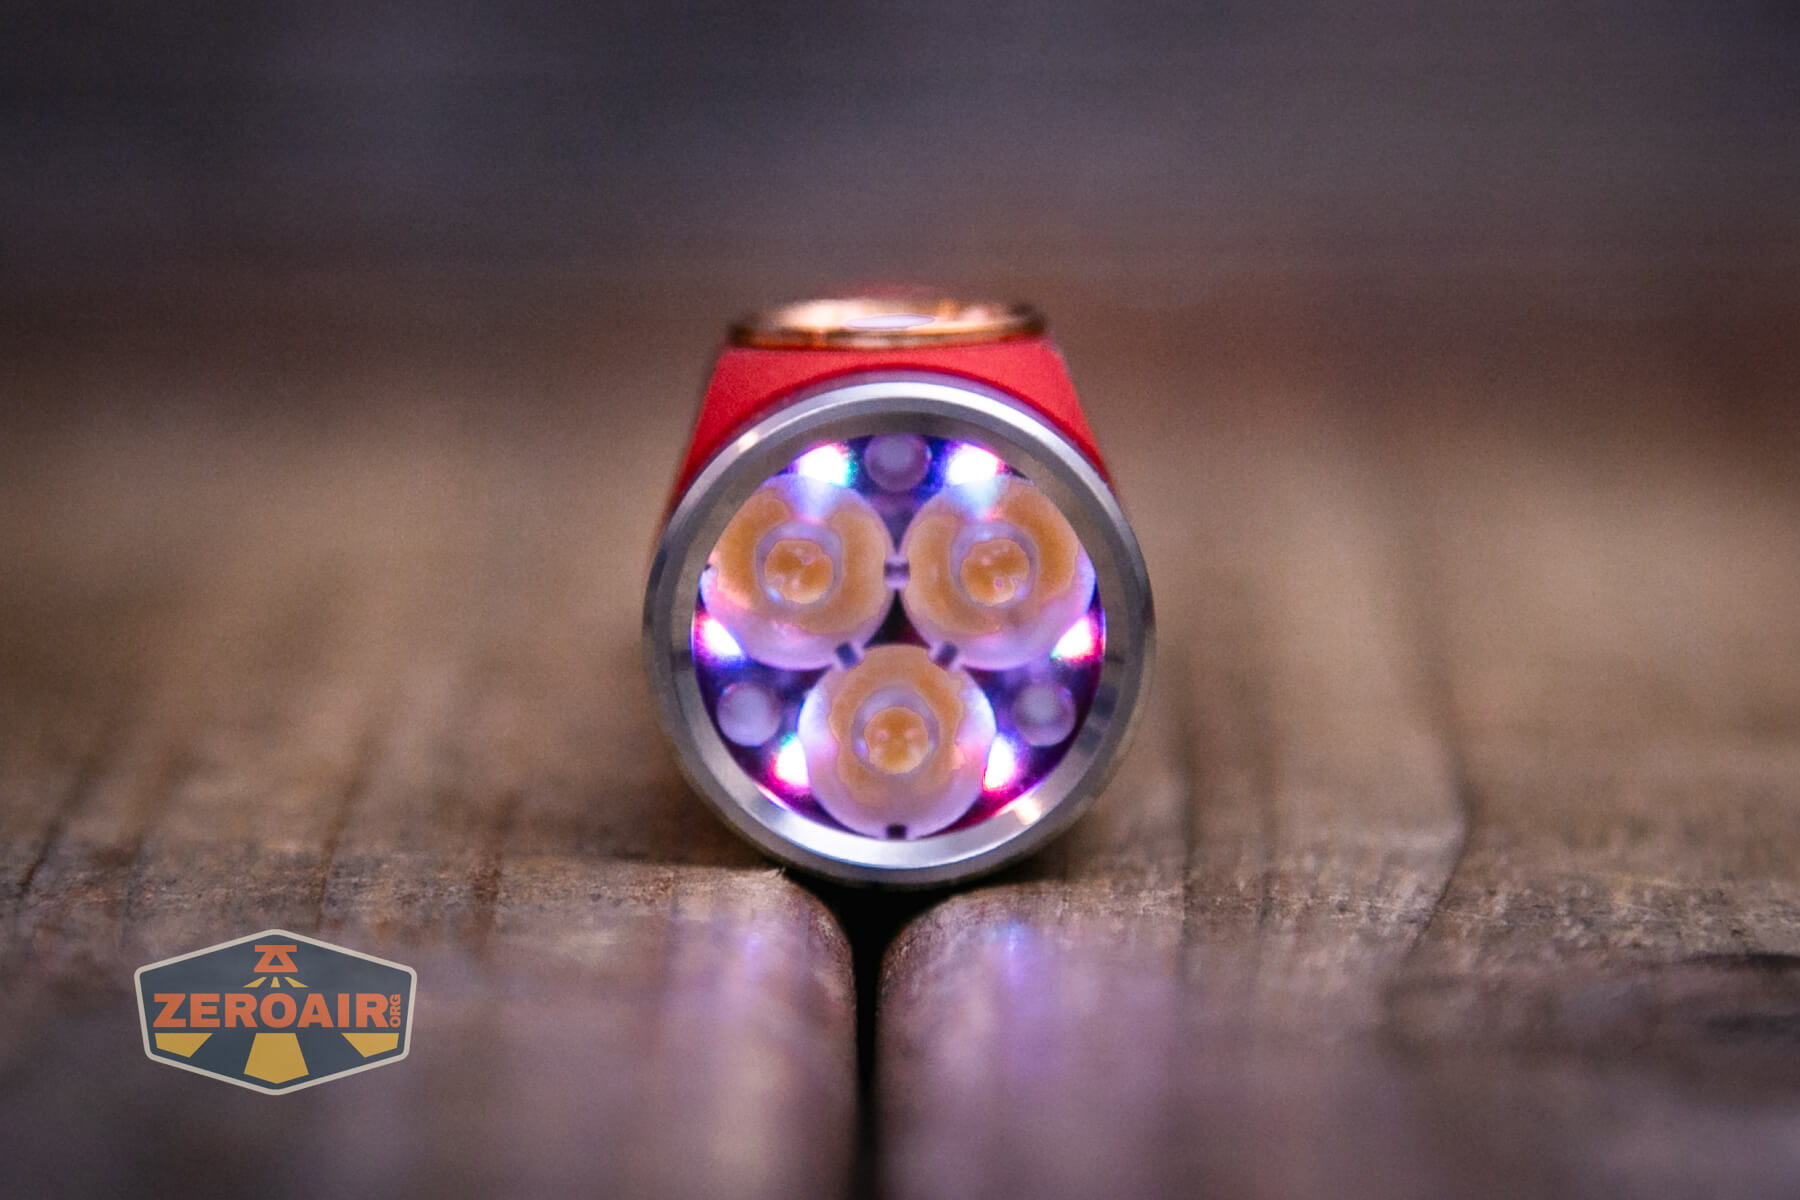
You may get a flat or raised change bezel. You may get many alternative change backlight colours (together with RGB, seen right here.)
There are additionally many emitter choices (I rely 22 – however Hank of Emisar would possibly even do one thing customized should you ask!) That is an off-the-shelf possibility, of Nichia 519a 5700K.
Value
As pictured on this put up, the Emisar D3AA 4500K flashlight prices $45.30. Nichia 519a provides $7.5o (value it!) to the bottom value of $35.81. A magnet tailcap provides $4.99. There are lots of different issues you may add, too!
What’s Included

- Emisar D3AA 5700K flashlight
- Lanyard
- Spare o-rings (2)
Observe: the battery shouldn’t be included.
Package deal and Guide
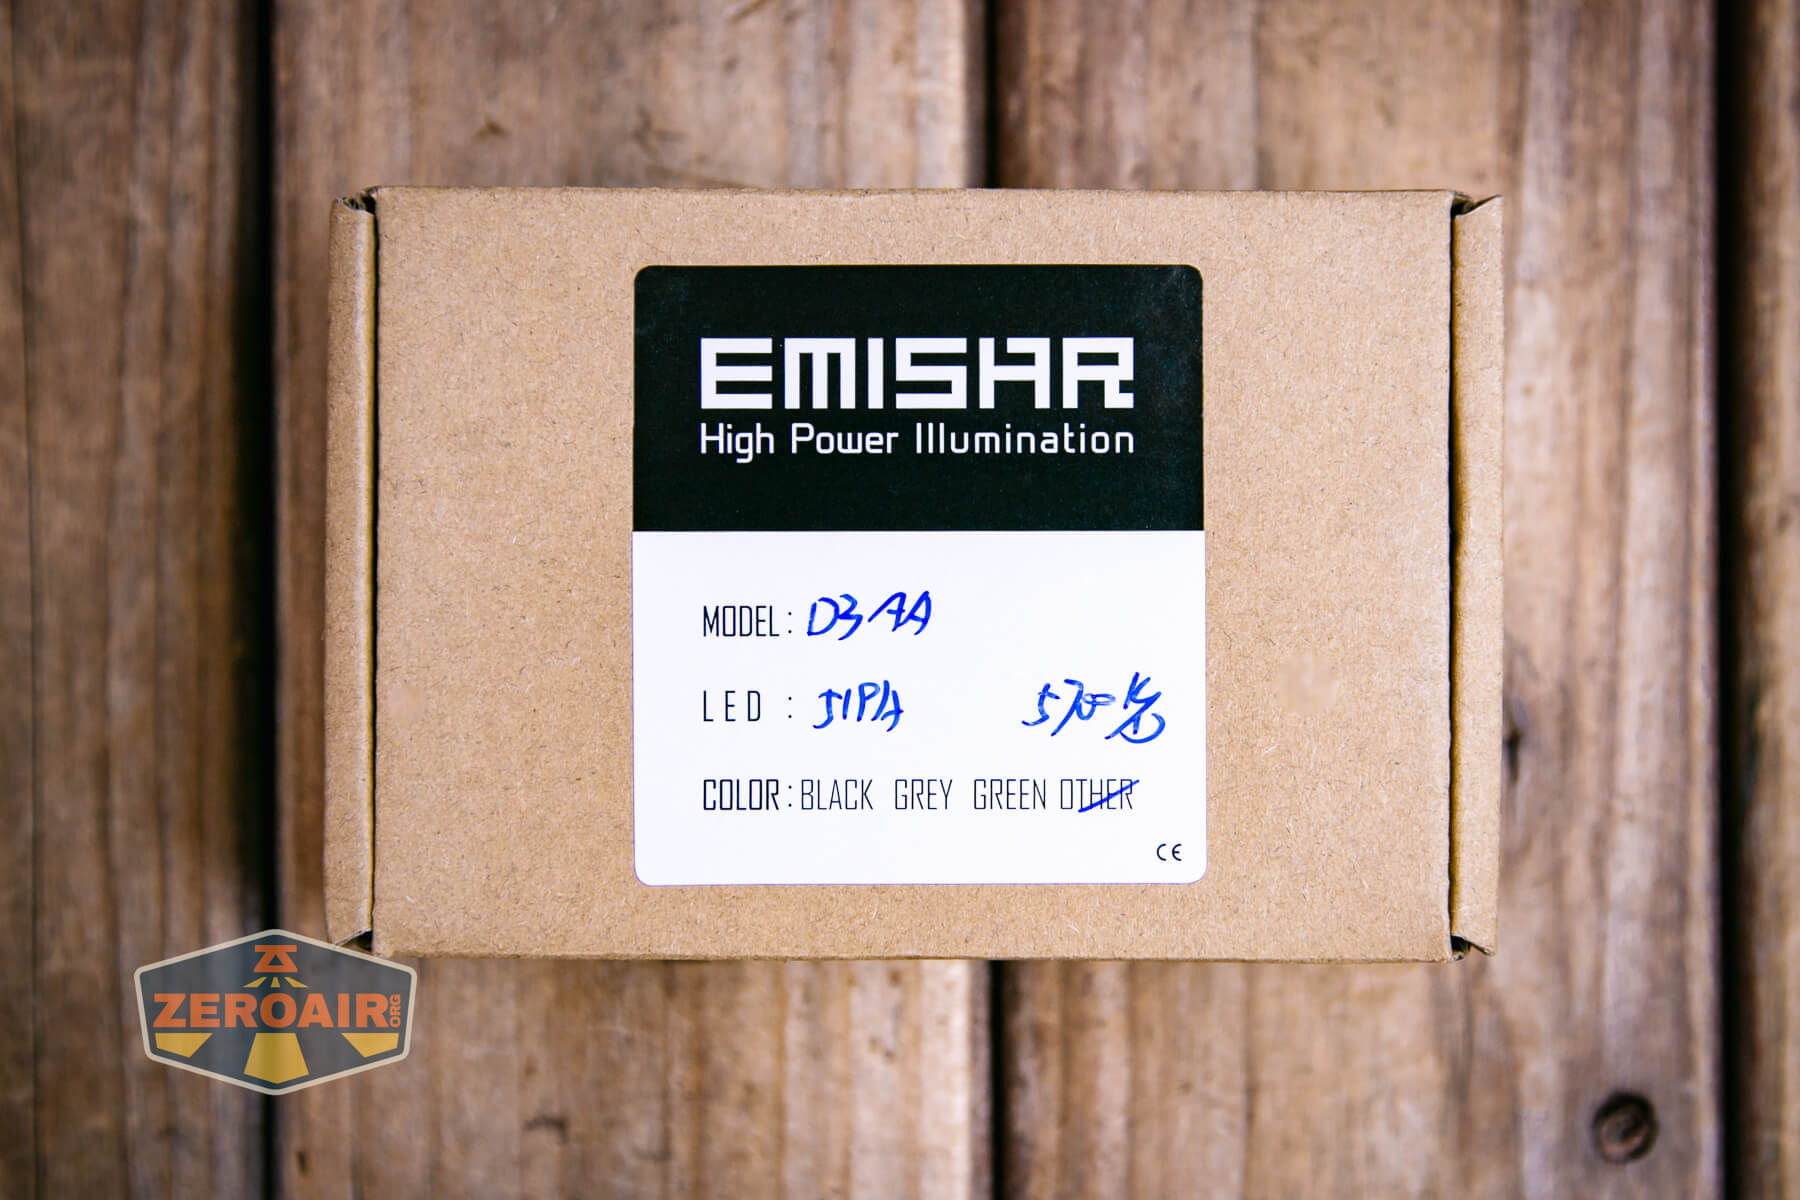
There is no such thing as a guide.
Construct High quality and Disassembly

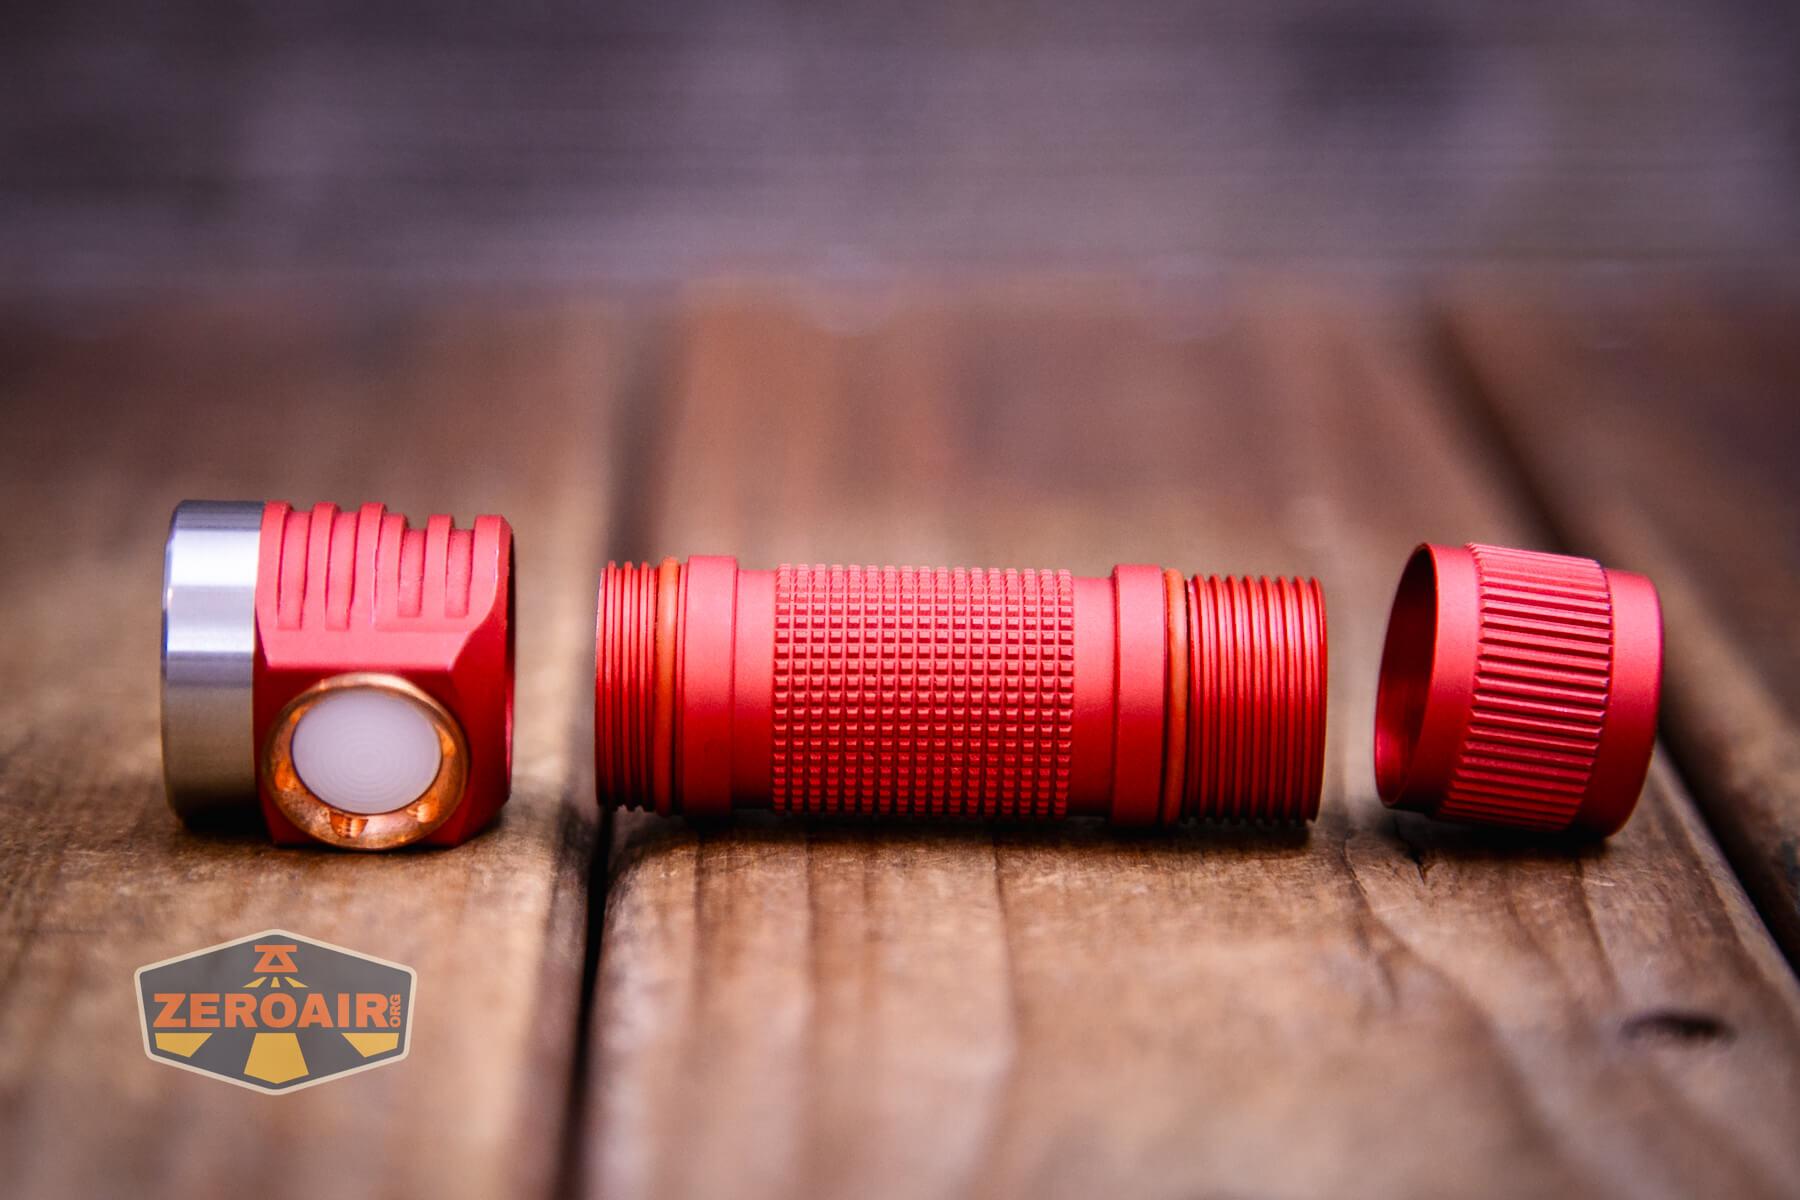
The Emisar D3AA 5700K flashlight very a lot looks like a small model of the venerable Emisar D4V2. I feel proportionally it’s barely completely different, however nonetheless – the look is there. Construct high quality is nice and the Emisar D3AA 4500K flashlight looks like greater than only a $35 gentle.
The physique is loads grippy. The anodizing isn’t “chalky” however leans that method – the anno itself supplies a giant of grip, and the knurling finishes that out.
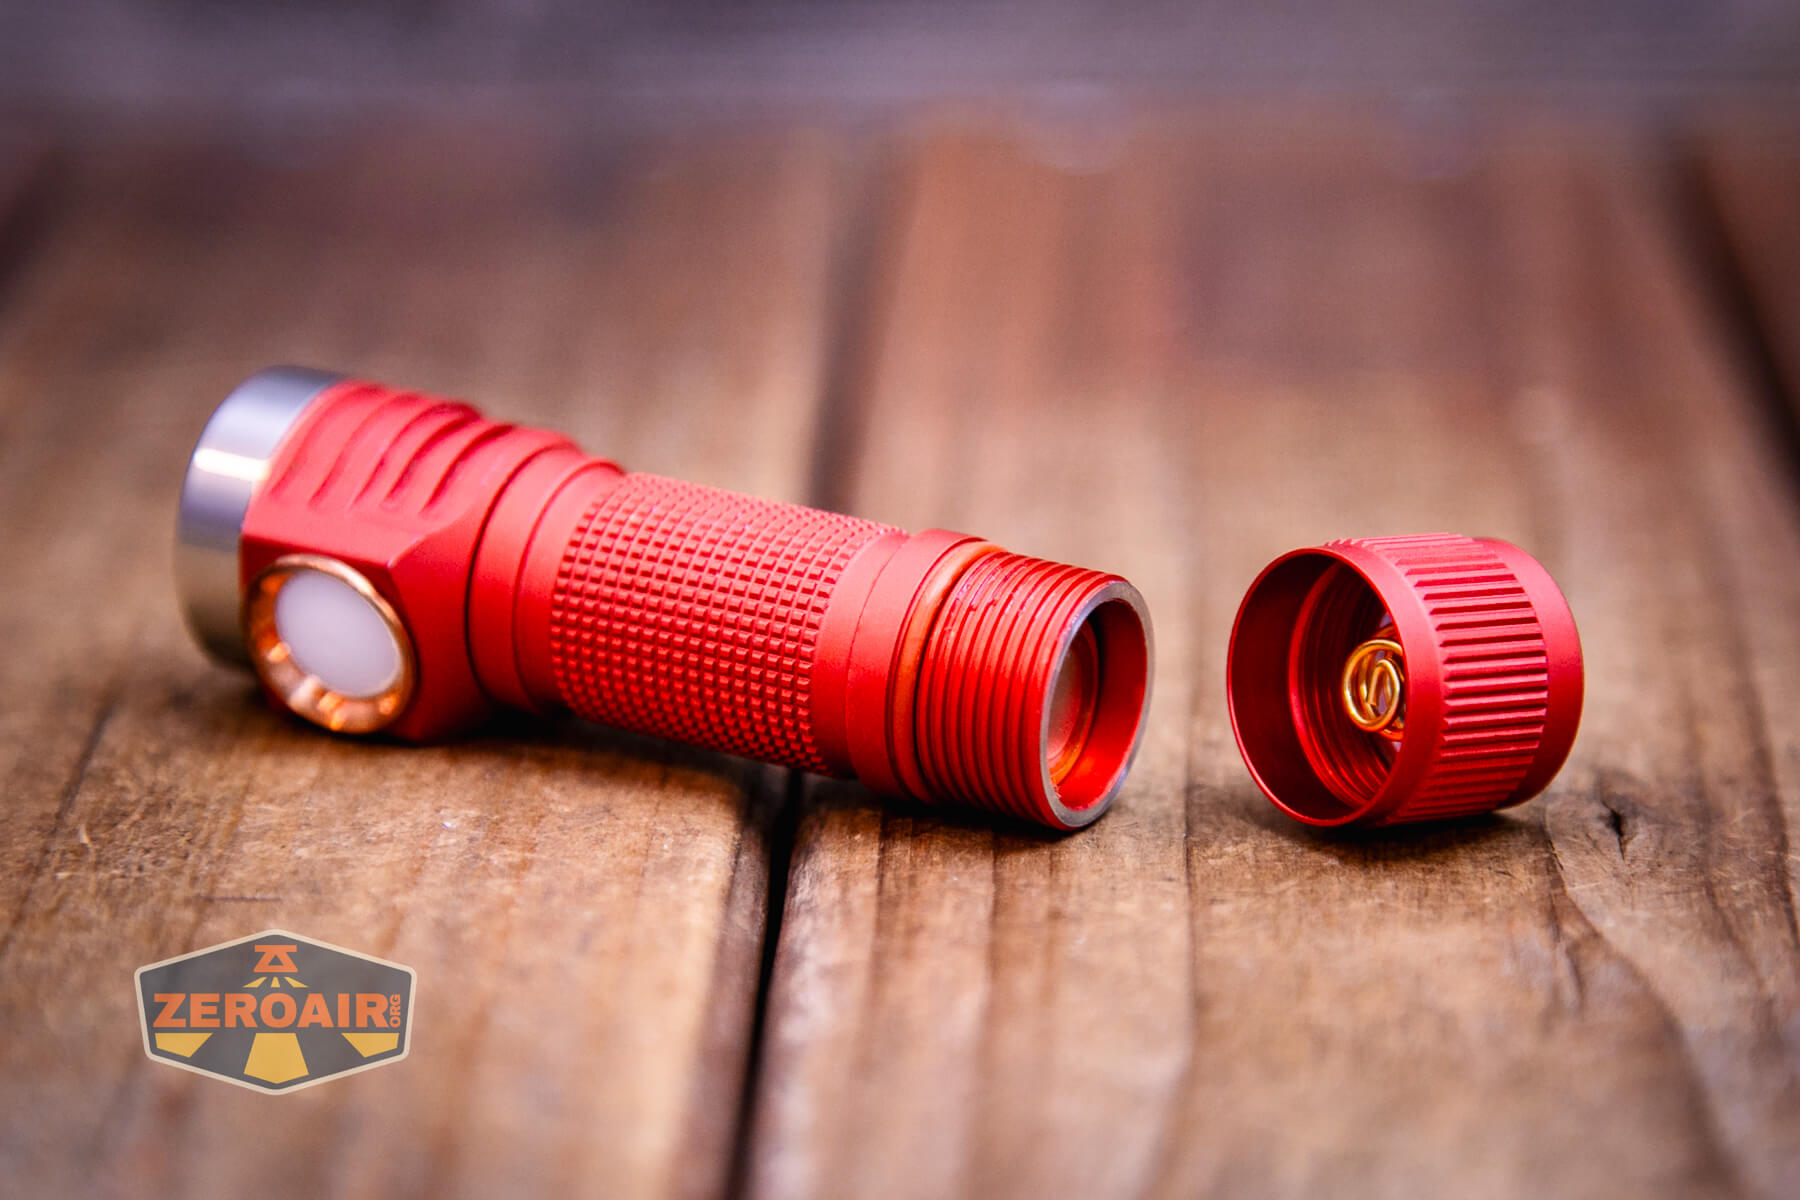
Each the top and tail can come off the cell tube. The cell tube isn’t reversible although, and there aren’t any different cell tube choices for the Emisar D3AA 5700K flashlight.
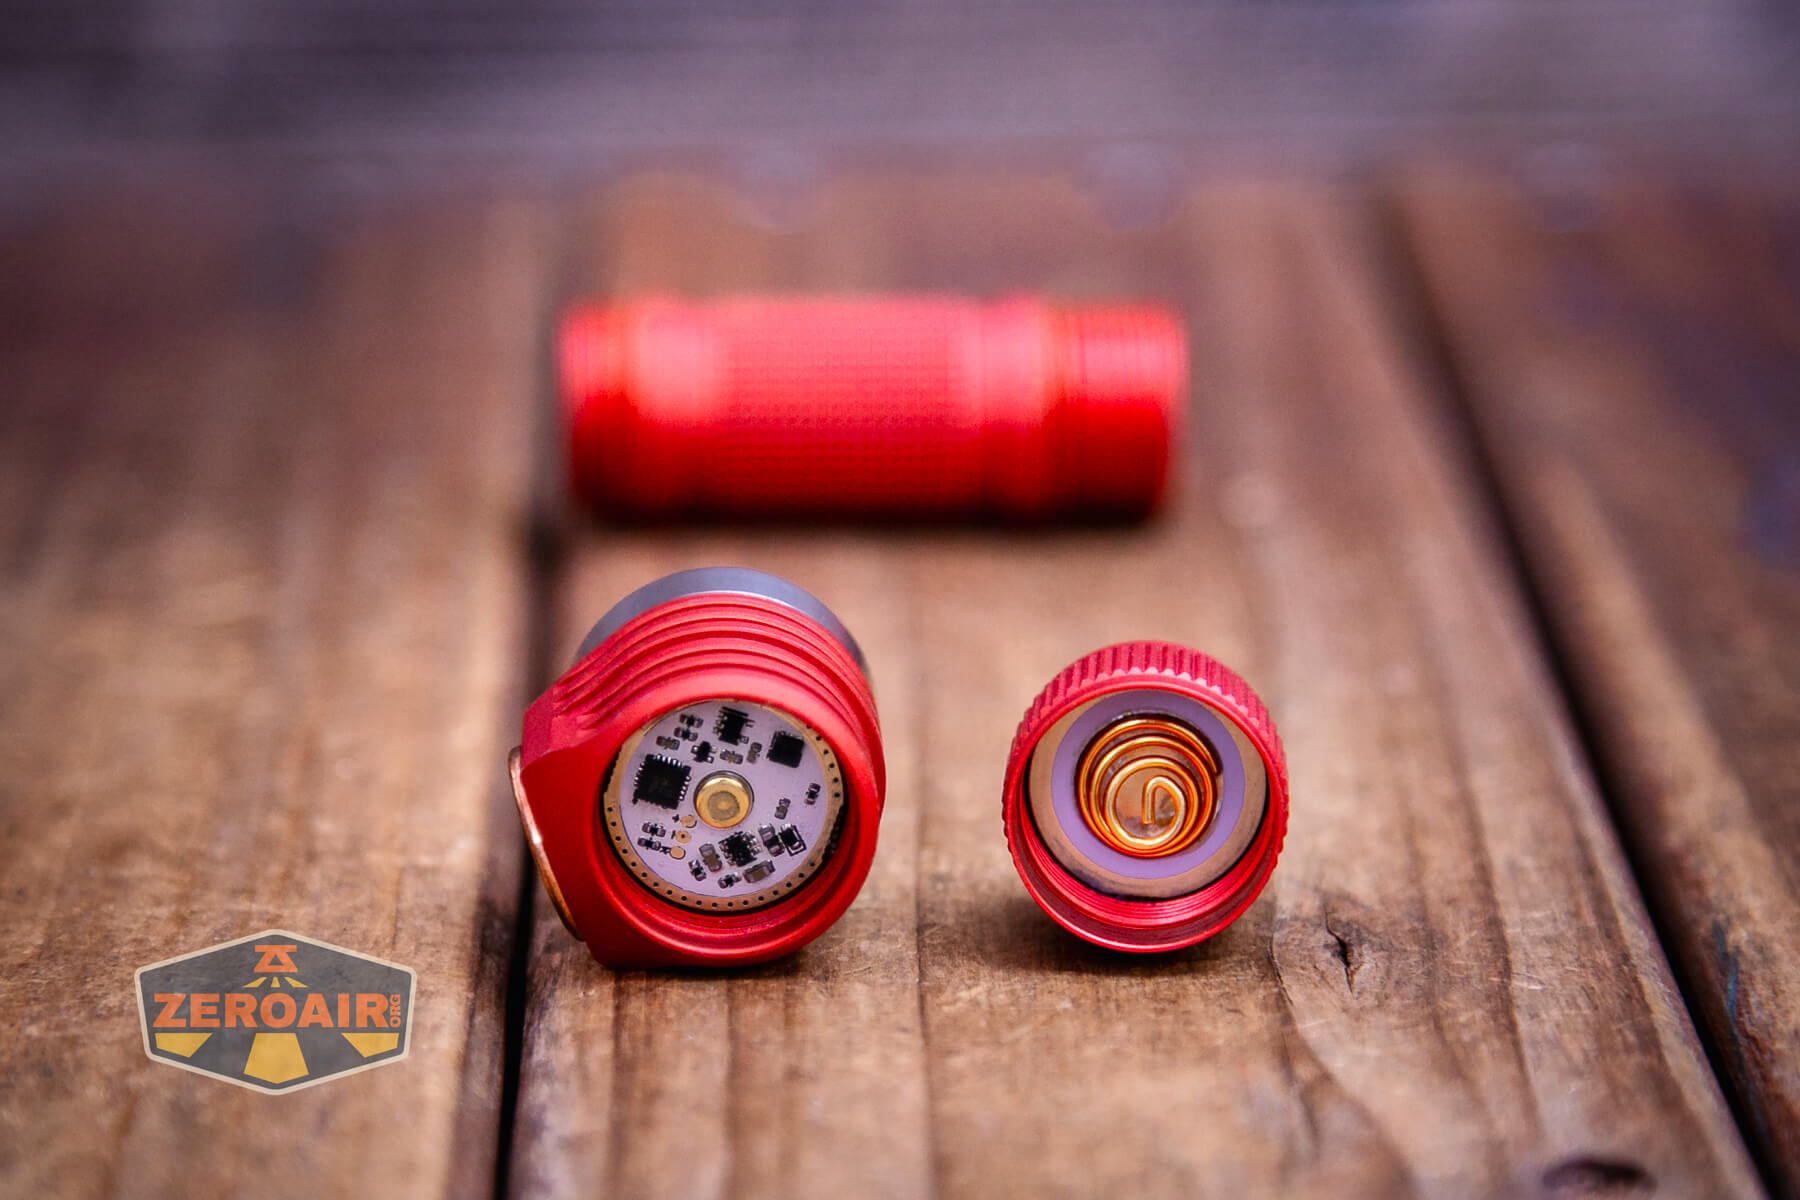
Beneath you may see the tailcap – that is the magnetic tailcap possibility and the magnet shouldn’t be (simply) detachable. It doesn’t seem like held in by the spring, as is so typically the case. On the left you may see the motive force, which Emisar describes as a “high-efficiency increase driver.”
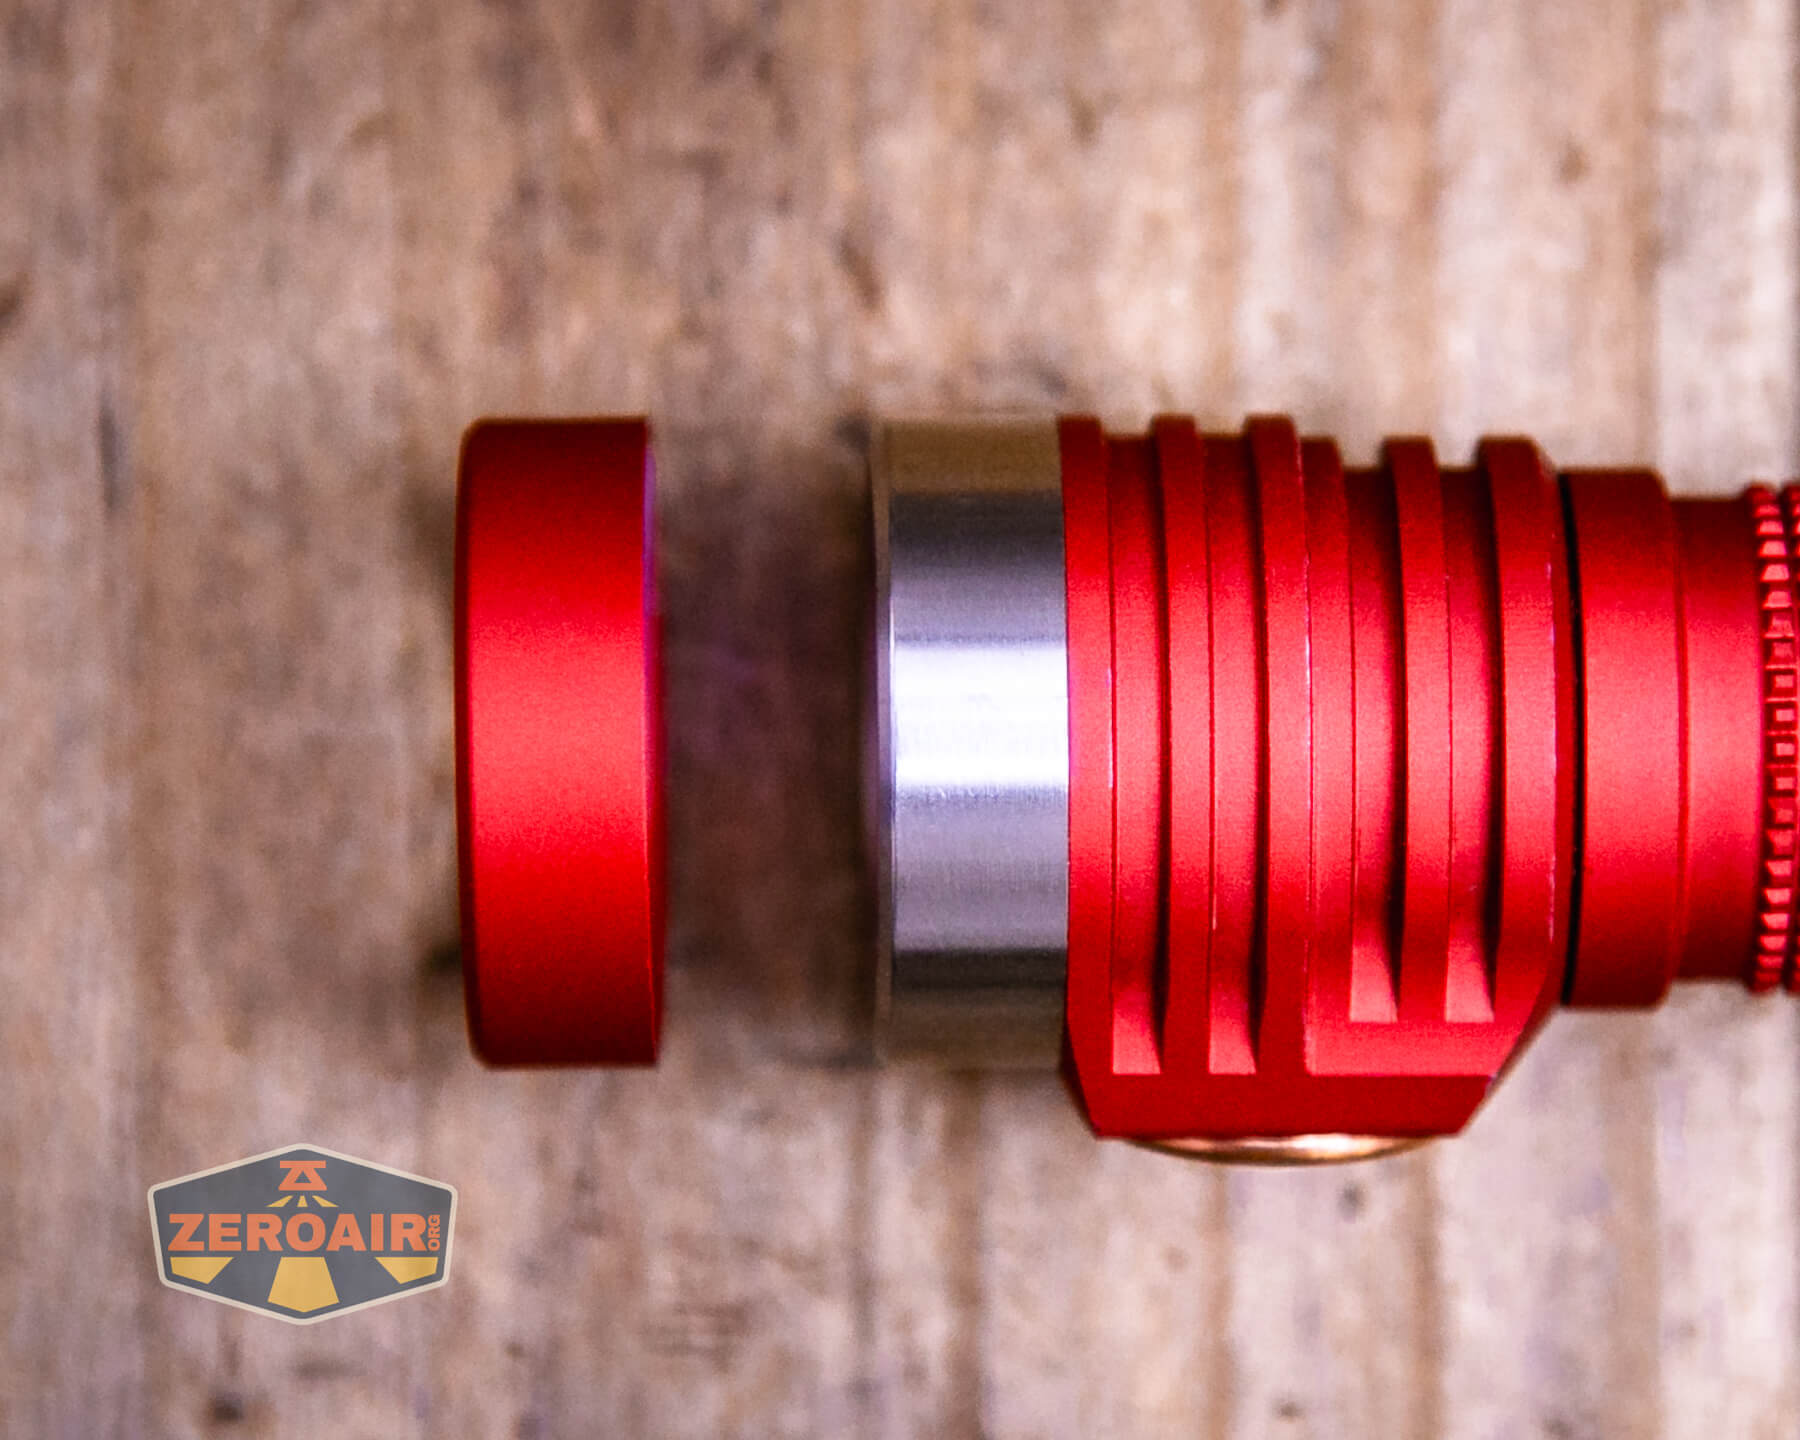
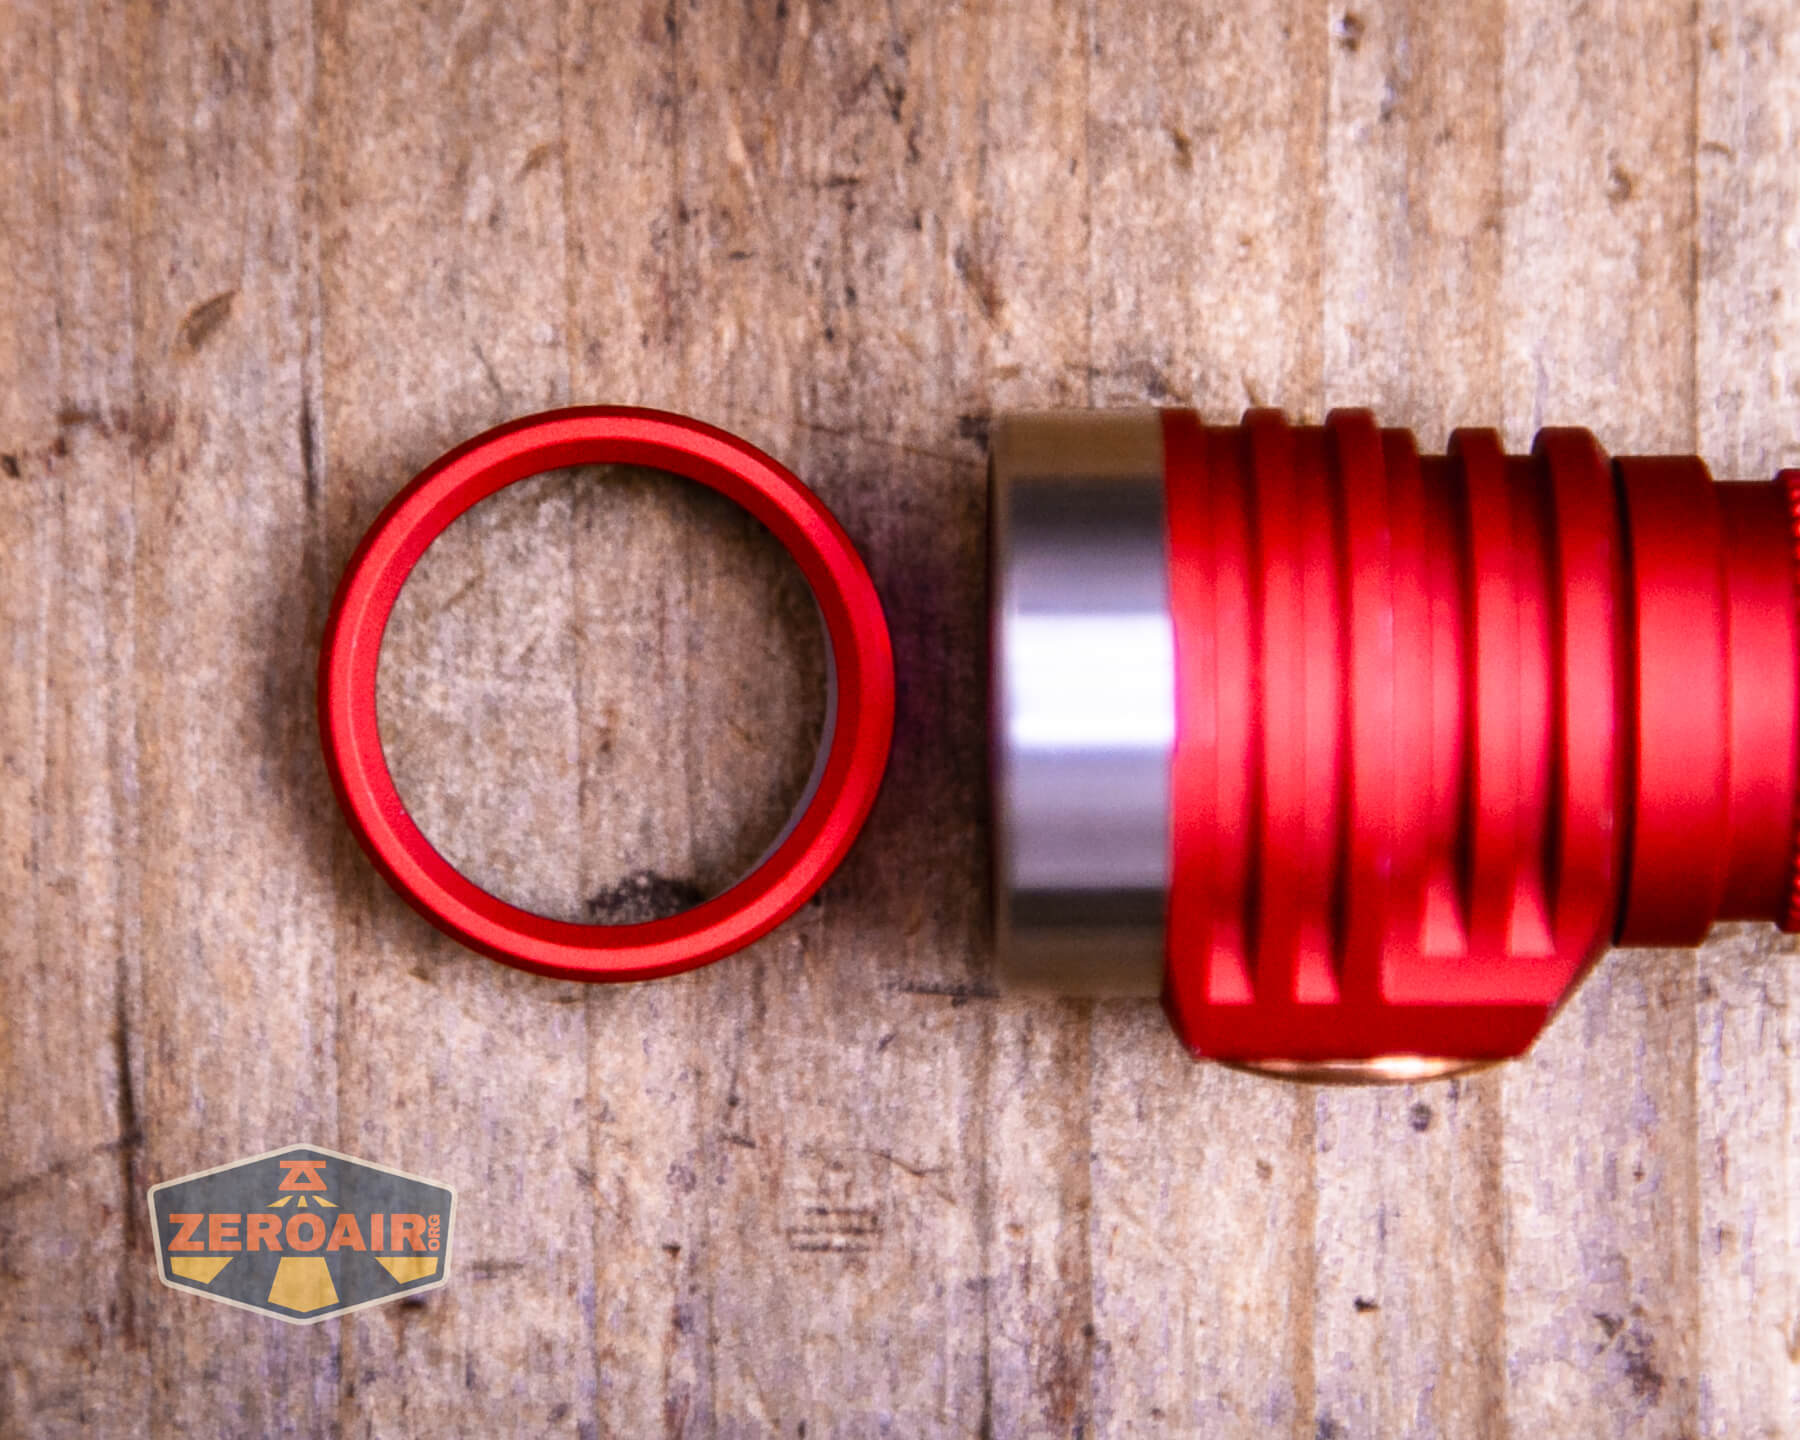
Beneath you may see the unique bezel (not put in) with the optionally available stainless bezel put in. The stainless-steel bezel is a pleasant improve!
Measurement and Comps
Dimensions: 78.3mm (size) x 24mm (head) x 19mm (physique)
Weight: 38.5g (with out magnet)
If the flashlight will headstand, I’ll present it right here. If the flashlight will tailstand, I’ll additionally present that right here too!


Right here’s the check gentle with the venerable Convoy S2+. The model beneath is a customized laser-engraved Convoy S2+ host by GadgetConnections.com. I did a full put up on an engraved orange host proper right here! Or go straight to GadgetConnections.com to purchase your Convoy S2+ now!
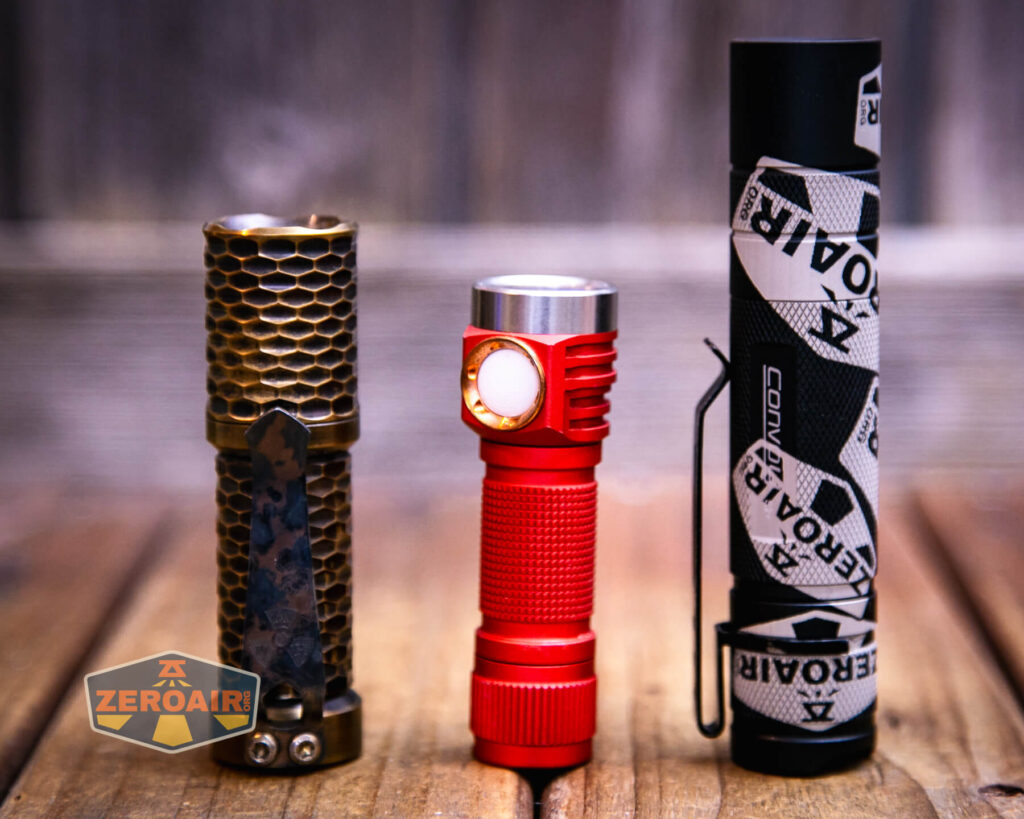
Within the photograph above, you could notice that the SRM (commonplace reference materials) flashlight for comparability has modified! I used a TorchLAB BOSS 35 for ages. Now what you may see because the 18350 SRM is the Hanko Machine Works Trident. Whereas I’ve not reviewed or examined the Gunner Grip model seen right here, I’ve examined a Hanko Machine Works Trident Whole Tesseract in brass. I really like the Trident, and it’s a pleasant juxtaposition beside the cheap Convoy S2+, which I additionally love to make use of as an SRM.
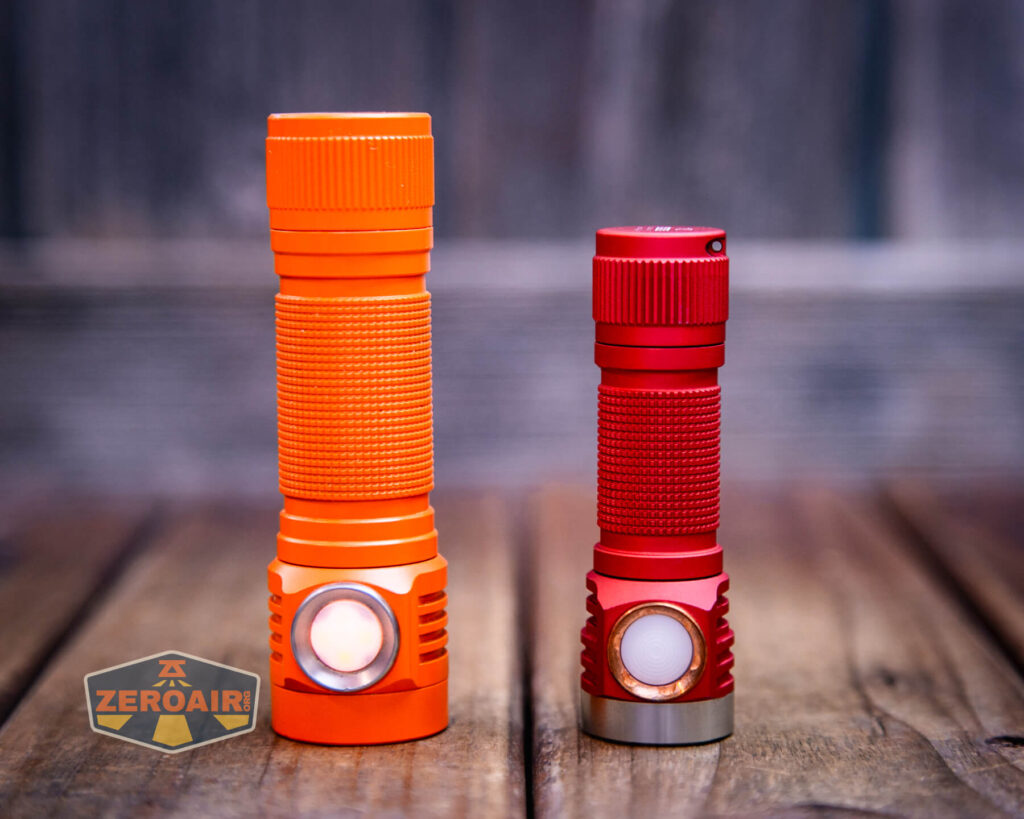
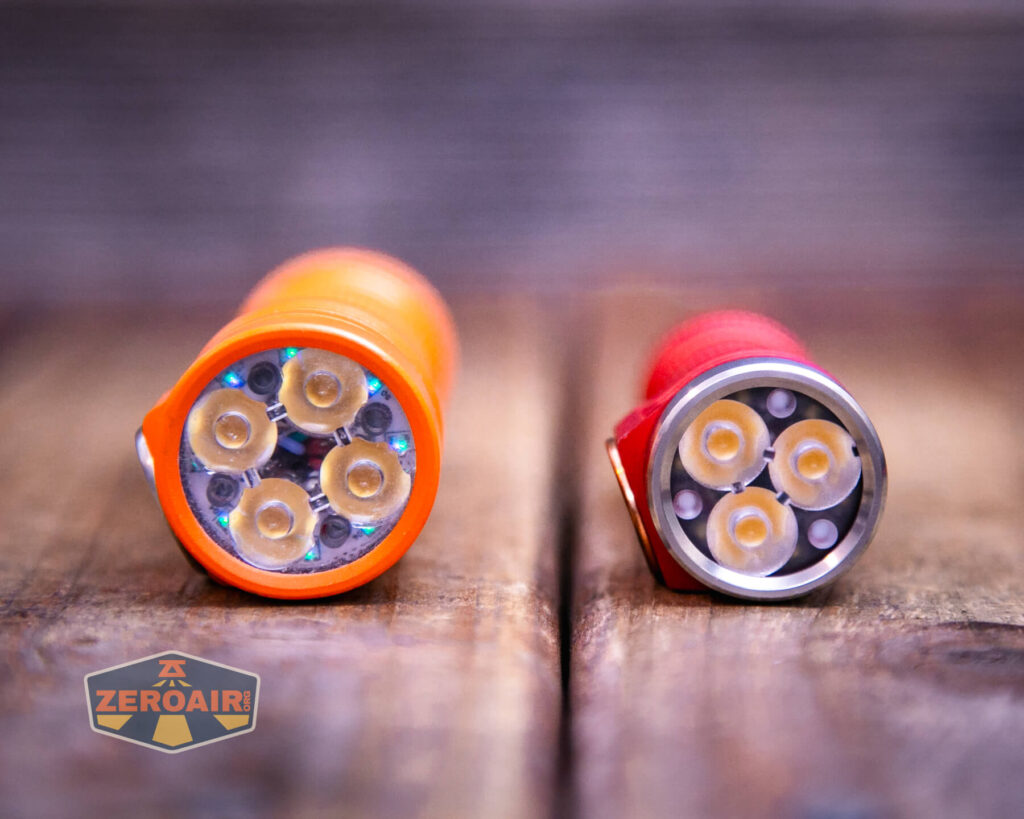
Beneath you may see the Emisar D3AA 5700K flashlight beside an aluminum Emisar D4V2. This one could be very particular! It’s cerakoted orange and has different specs which can be very a lot to my style! However in dimension, it’s a typical 18650 D4V2, good for comparability towards this tiny D3AA.
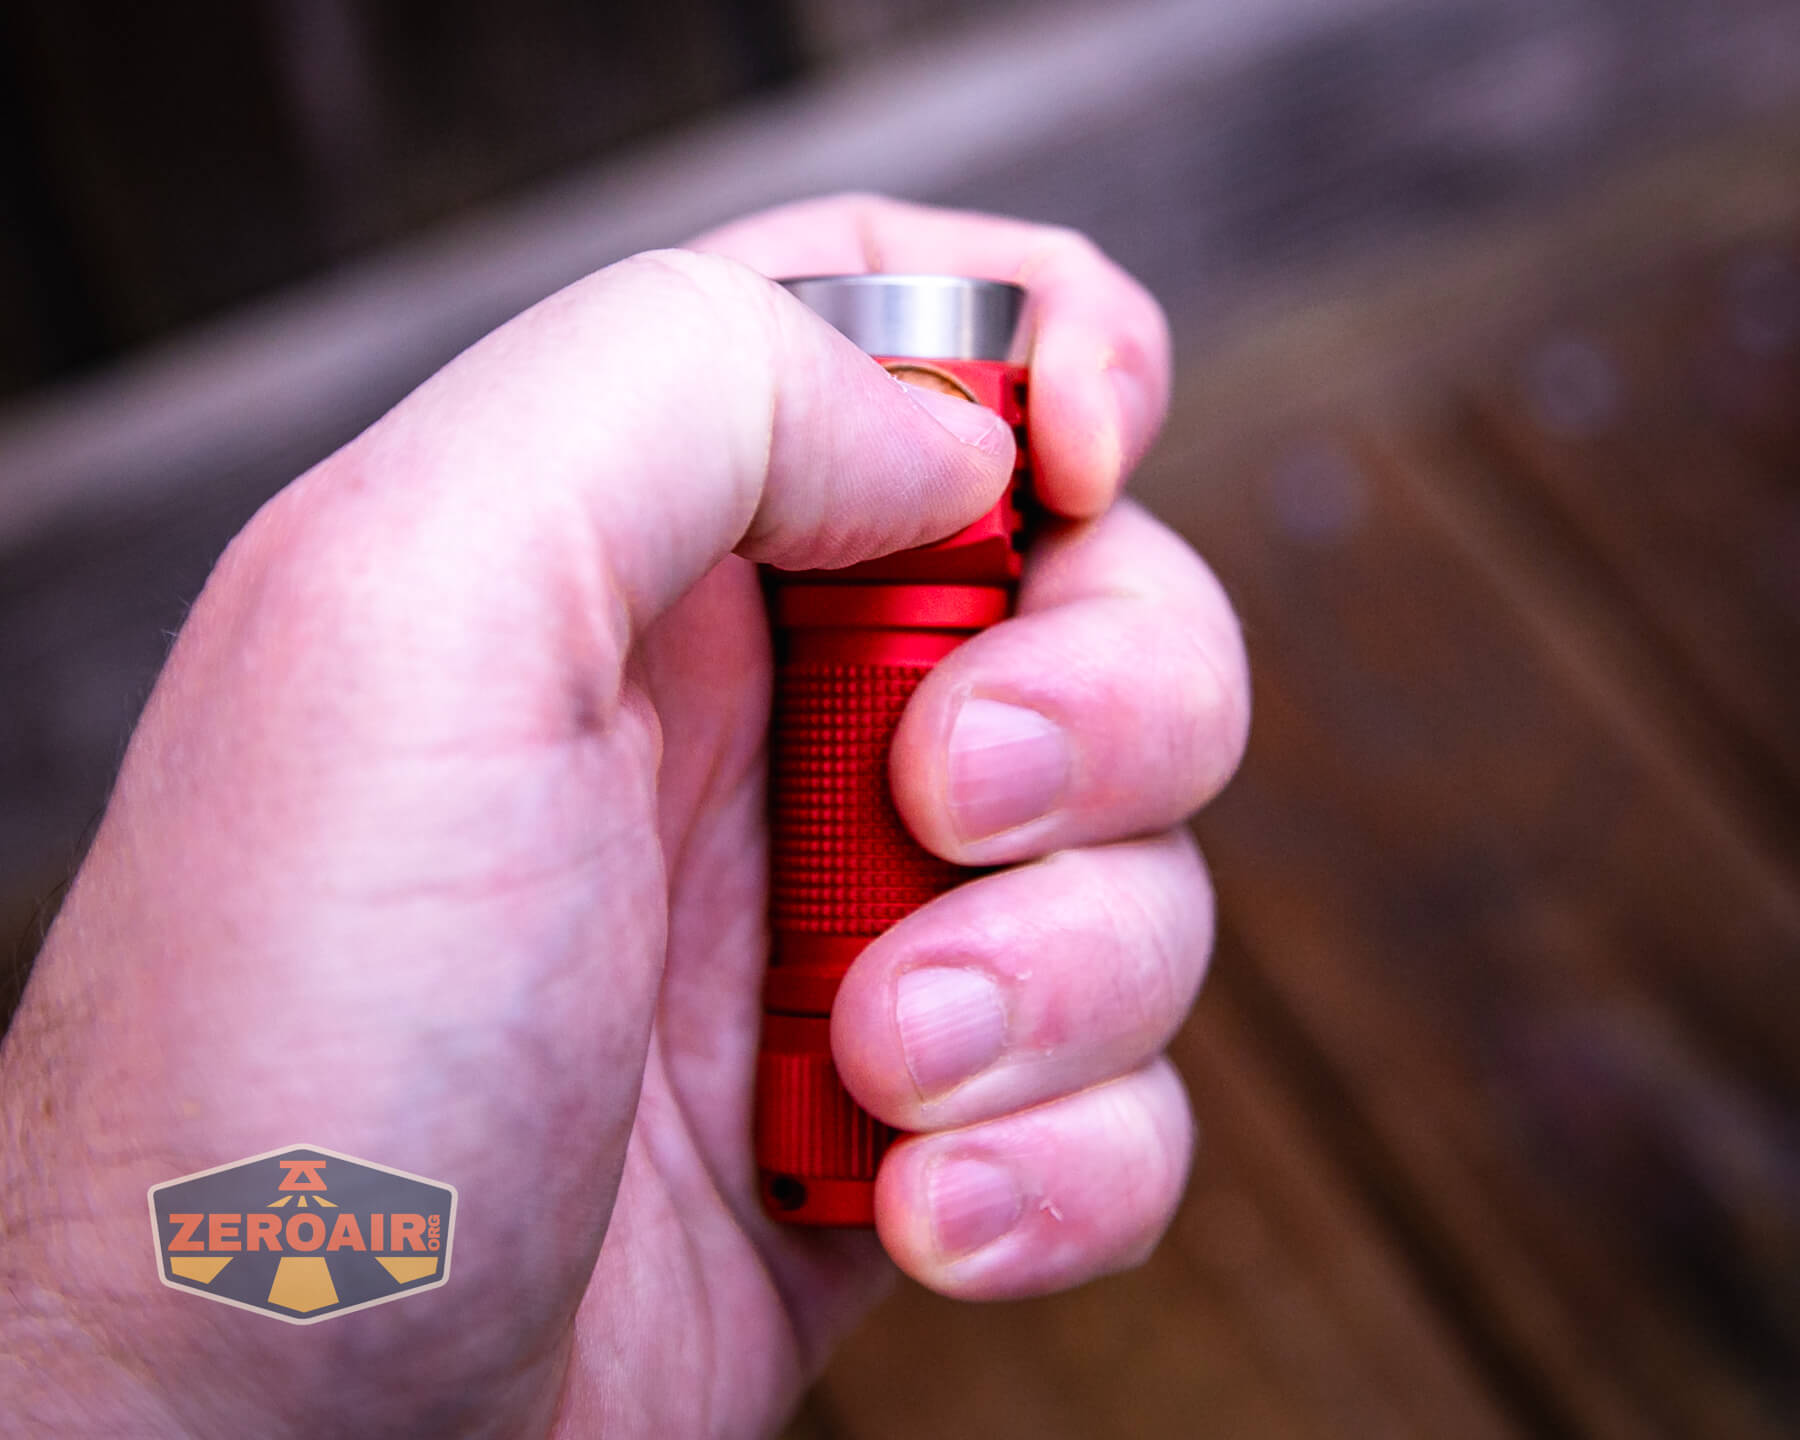
Retention and Carry
A pocket clip is obtainable, however I’ve not bought that but. I do have a tailcap magnet, although, which is loads sturdy for holding this small gentle.
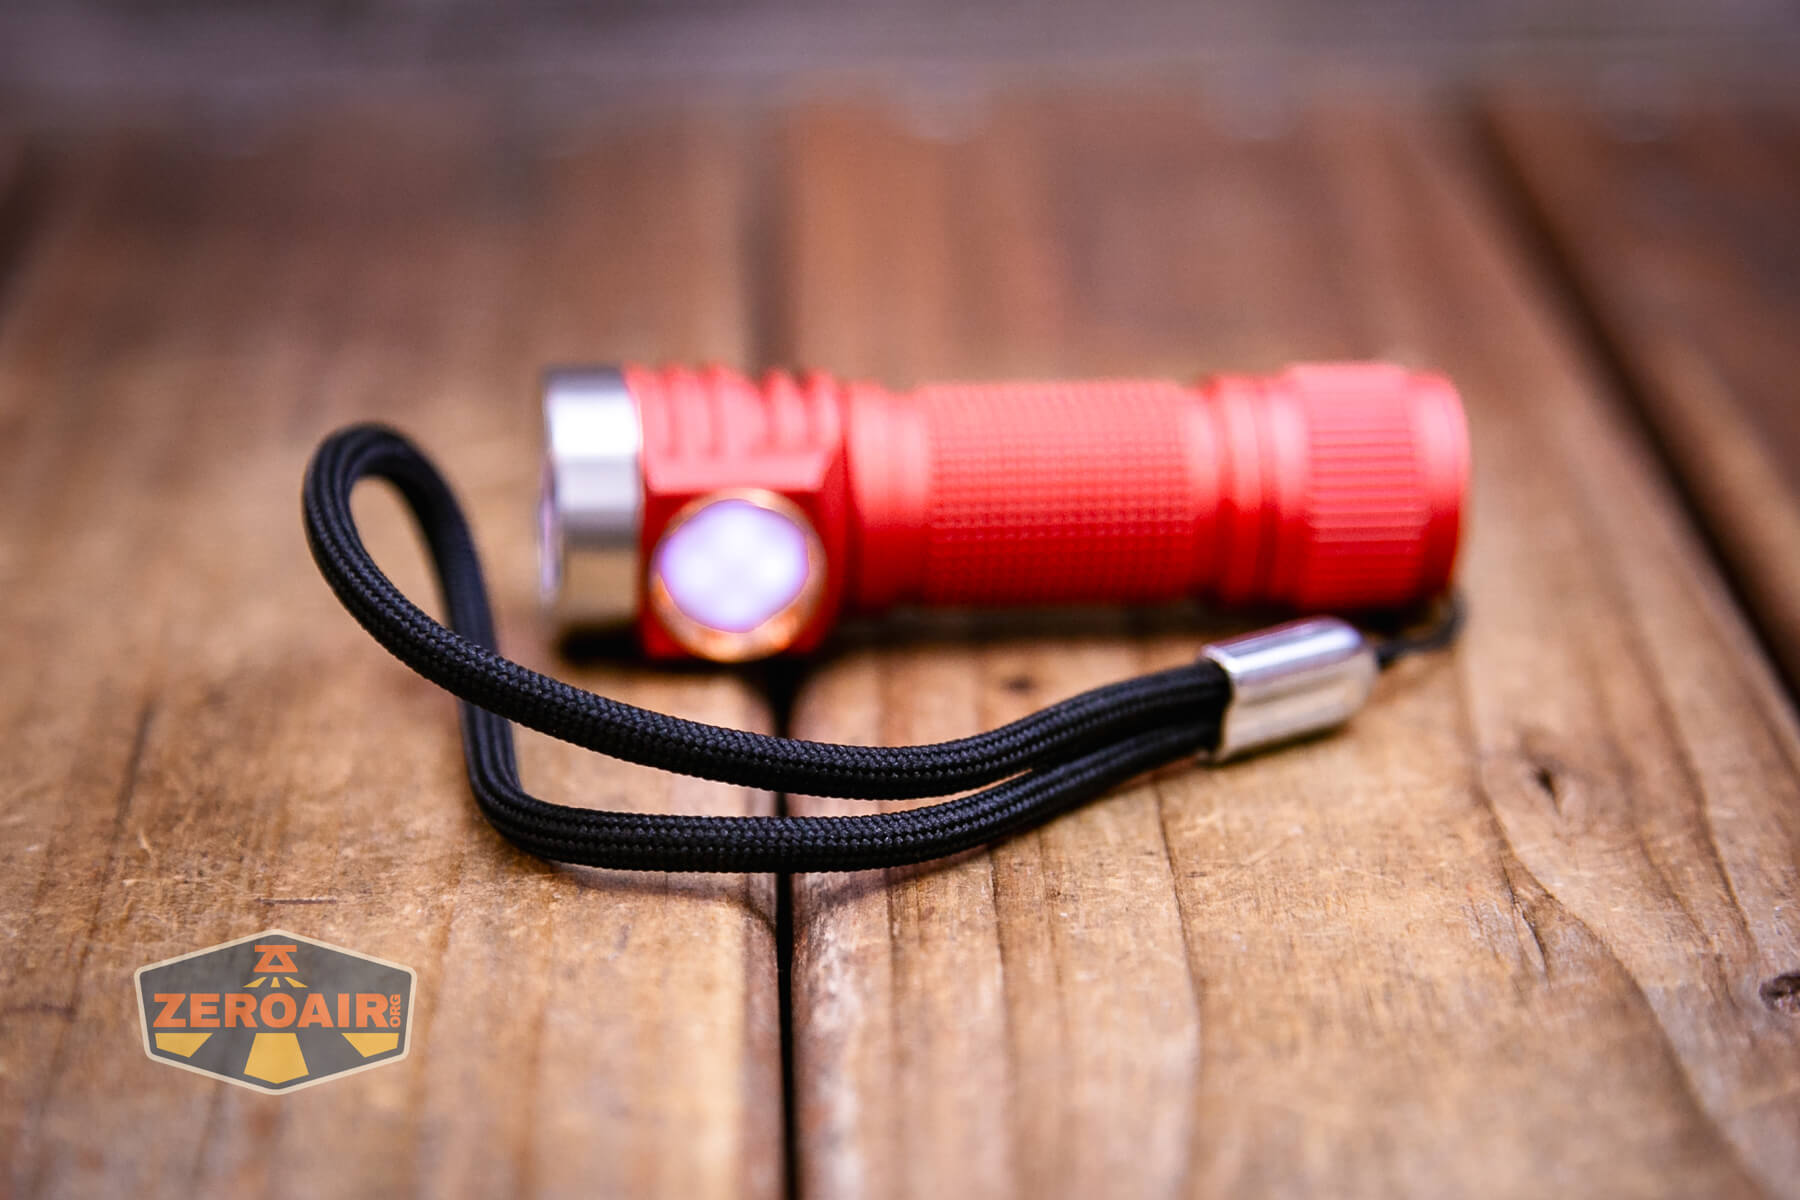
There’s additionally a lanyard included, which connects by way of a gap within the tailcap.
Energy and Runtime
The Emisar D3AA 5700K flashlight on lithium-ion cells. Emisar says it’ll work with button or flat prime cells, however not protected button prime cells, most likely as a result of added safety circuit size.
The cell goes into the Emisar D3AA 5700K flashlight within the traditional method – optimistic finish towards the top.
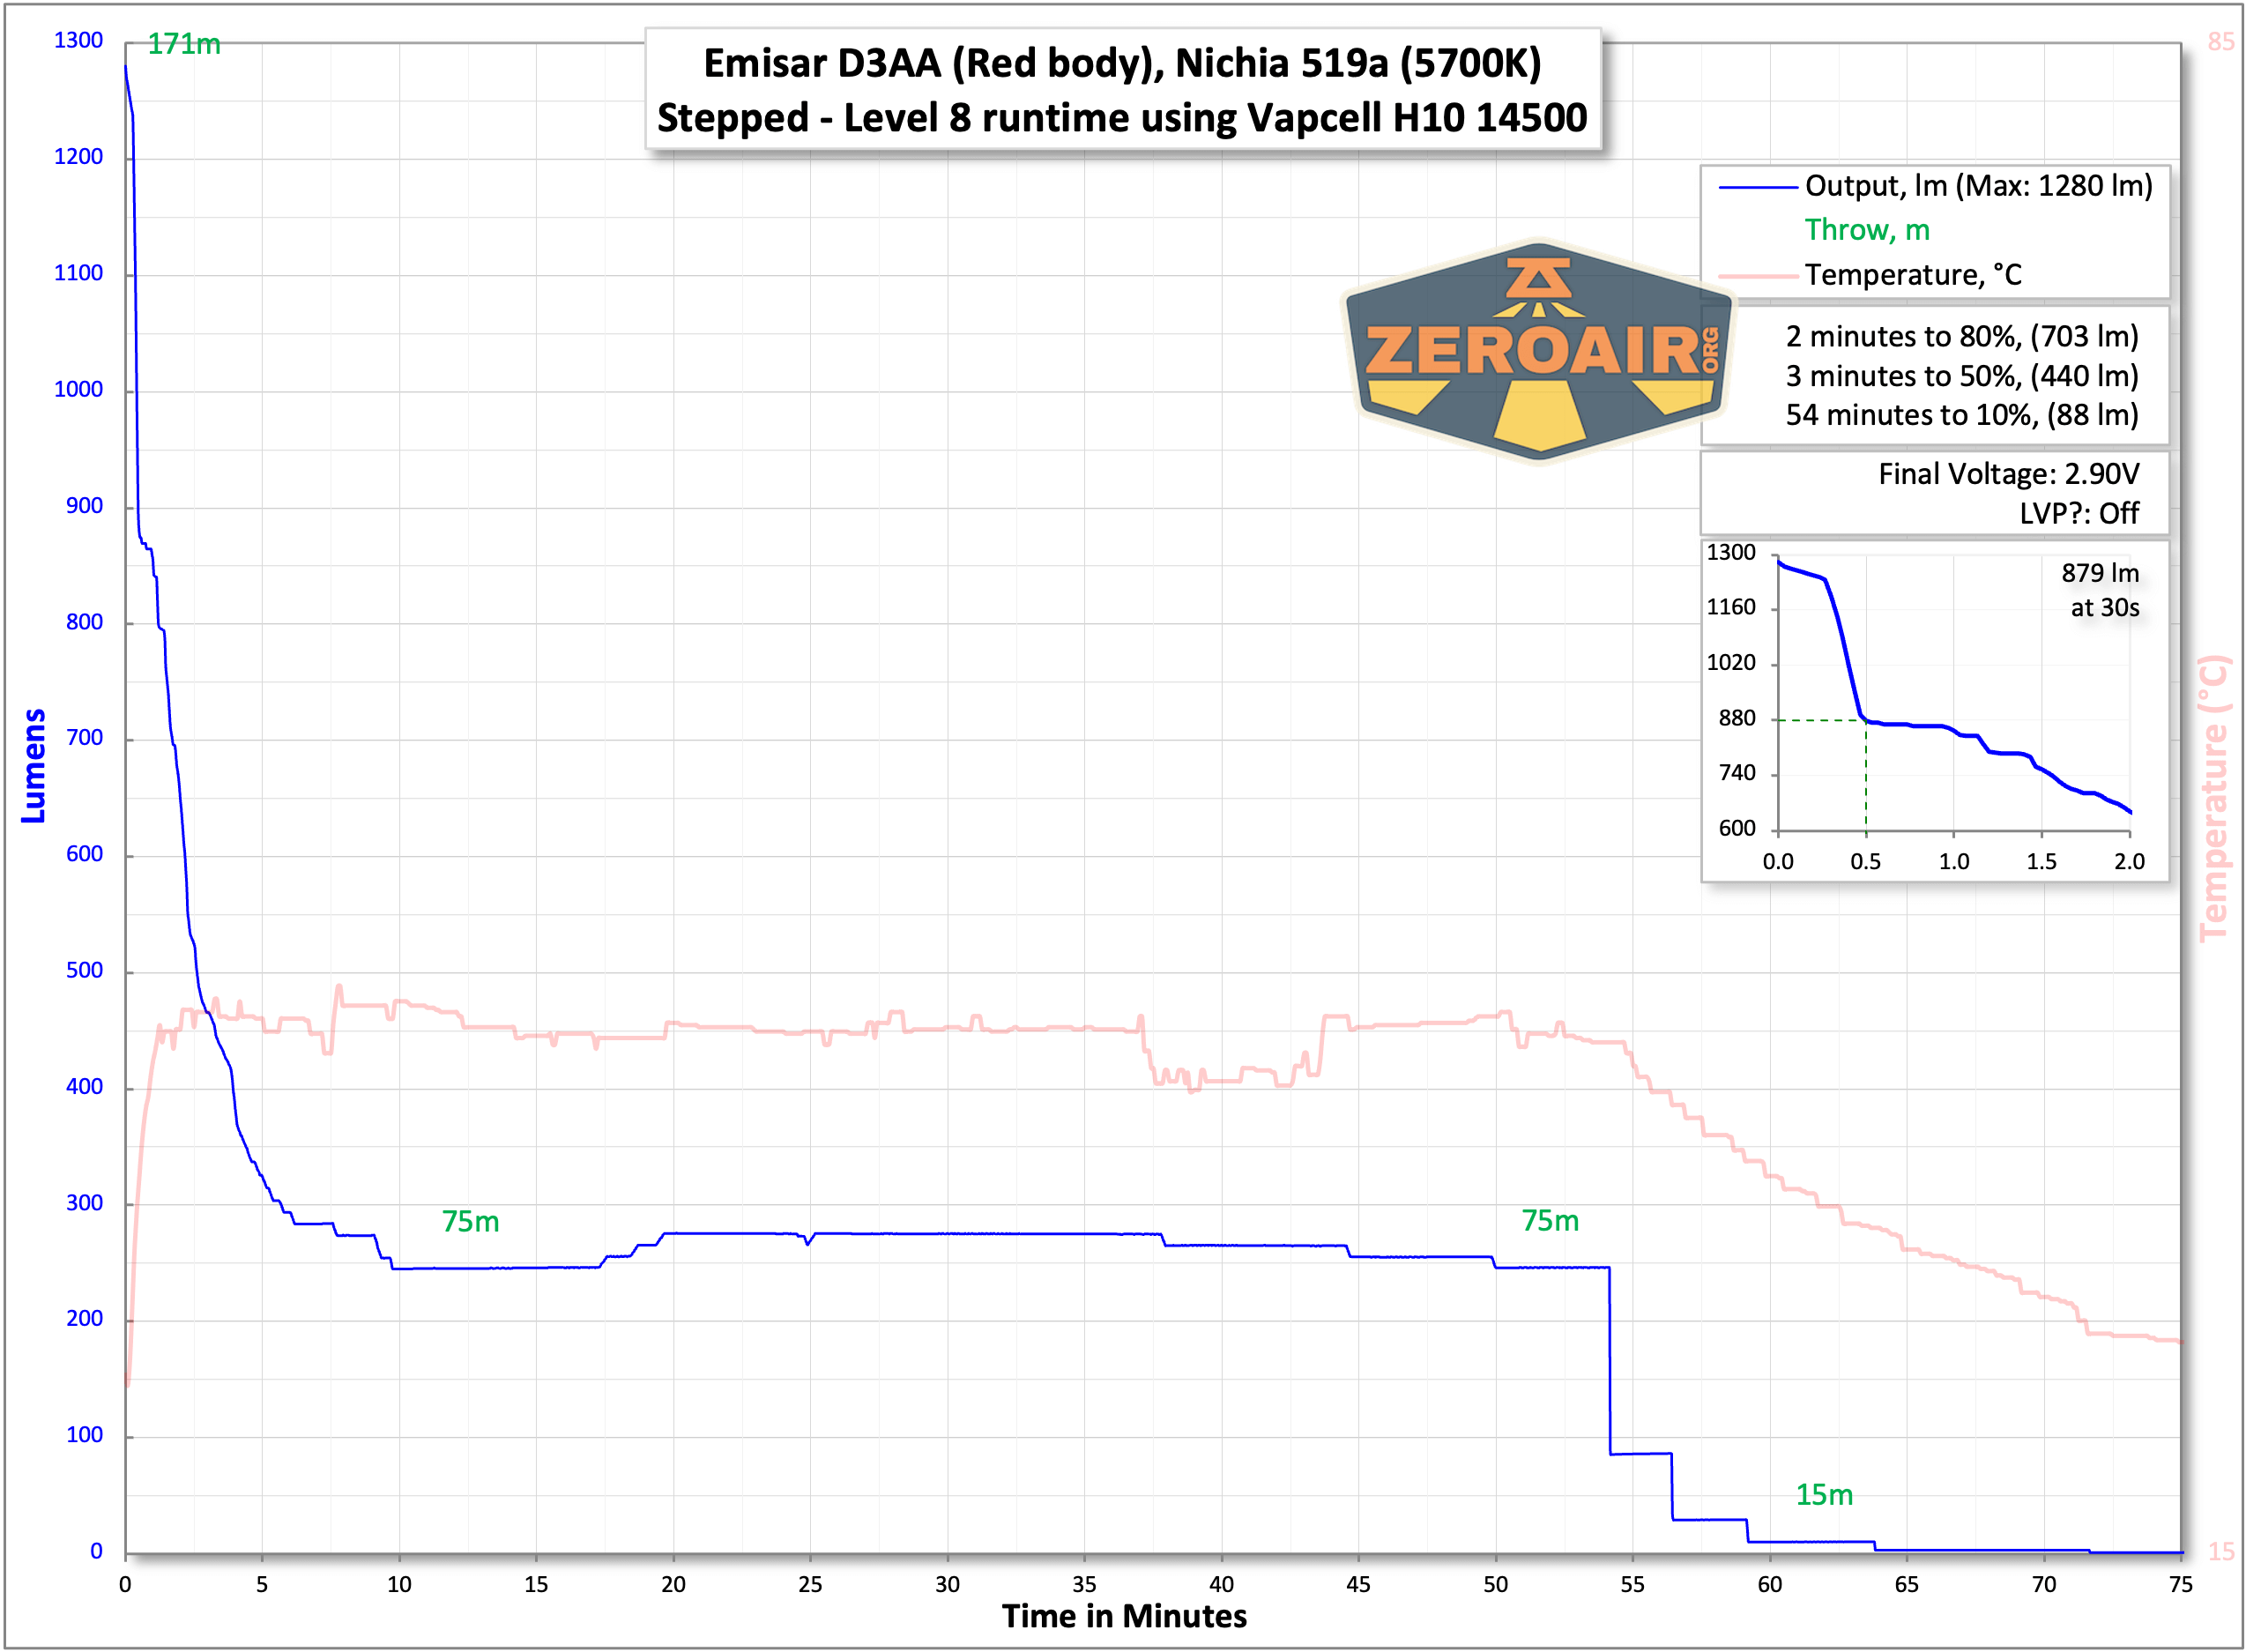
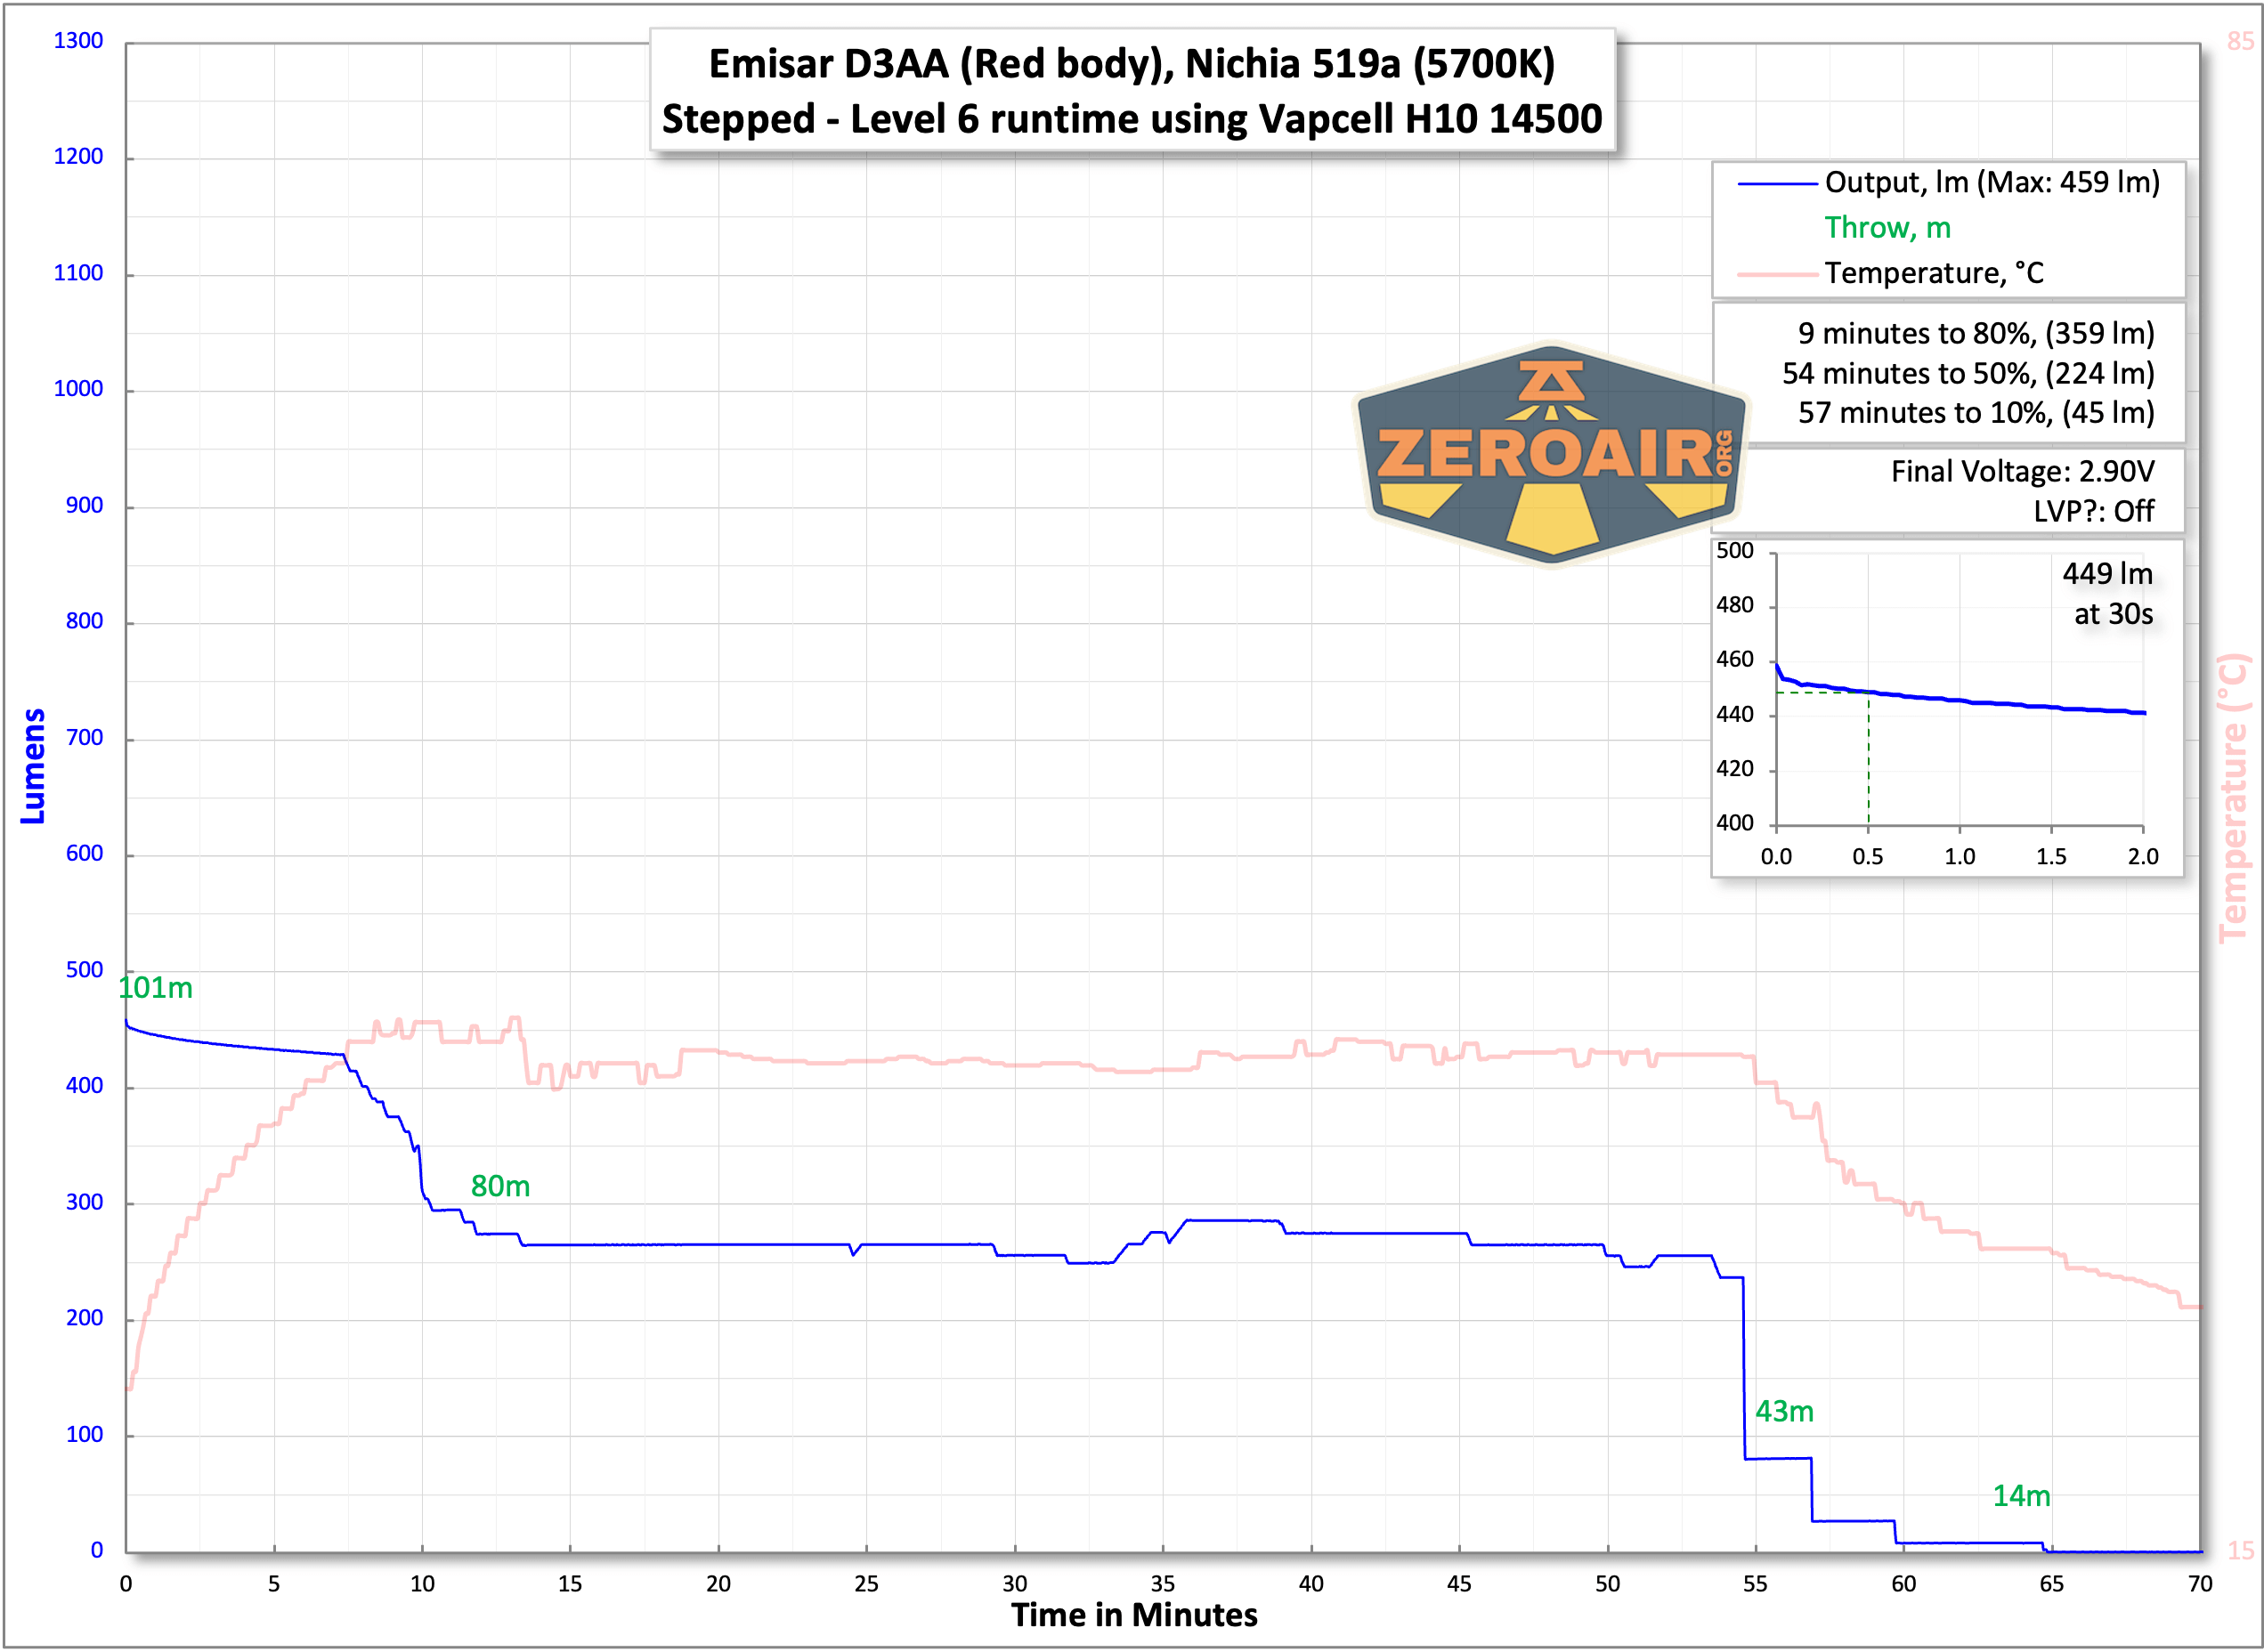
Listed below are runtimes on the best 4 modes with a 14500 cell. I examined with a Vapcell H10. It’s a flat prime, however that doesn’t change efficiency. Preliminary output is pretty nice and excellent as soon as the sunshine is round solely 300 lumens. I solely ever use stepped output, so I do know I can reliably get the 400-lumen degree – degree 6!
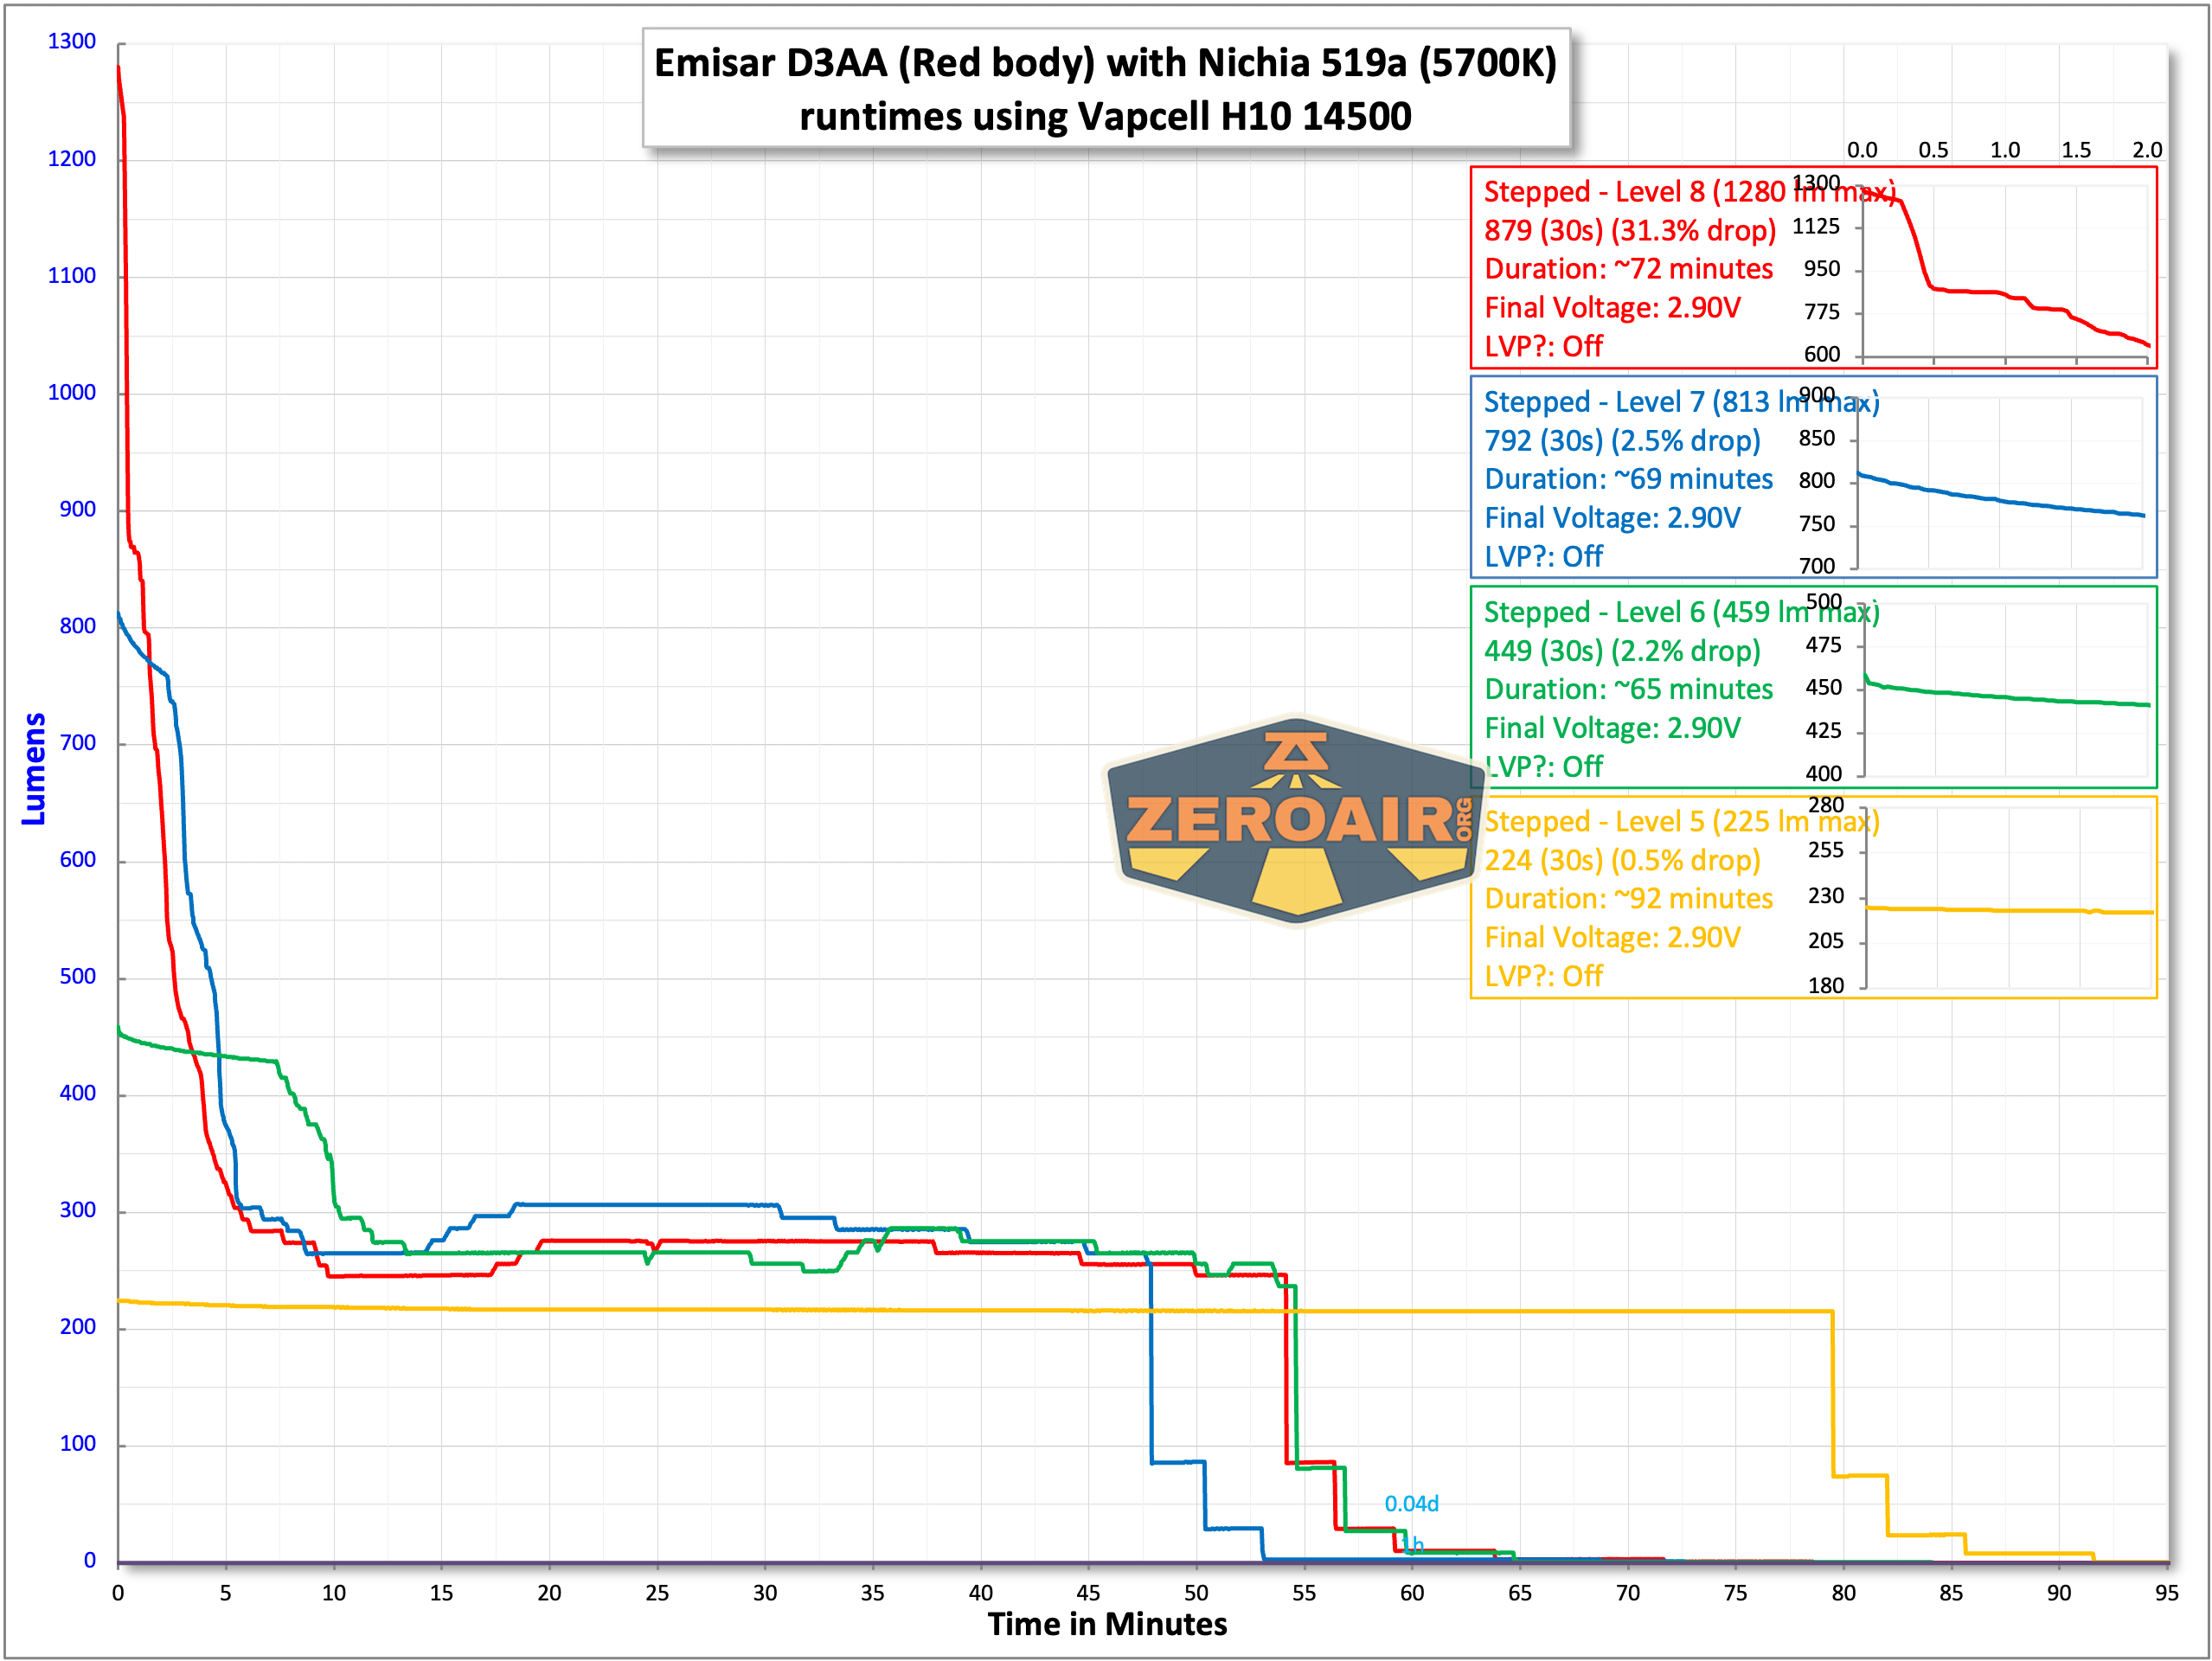


The Emisar D3AA 5700K flashlight does shut off when cell voltage will get round 3V, but it surely switches to the secondary RGB emitters. I’m undecided how lengthy these will keep on, however customers do report that there’s low voltage safety with the secondary emitters, too.
An awesome function of the Emisar D3AA 5700K flashlight is that it’ll additionally run 1.5V cells – main or rechargeable! I’ve examined a bit with this Ikea LADDA NiMH.
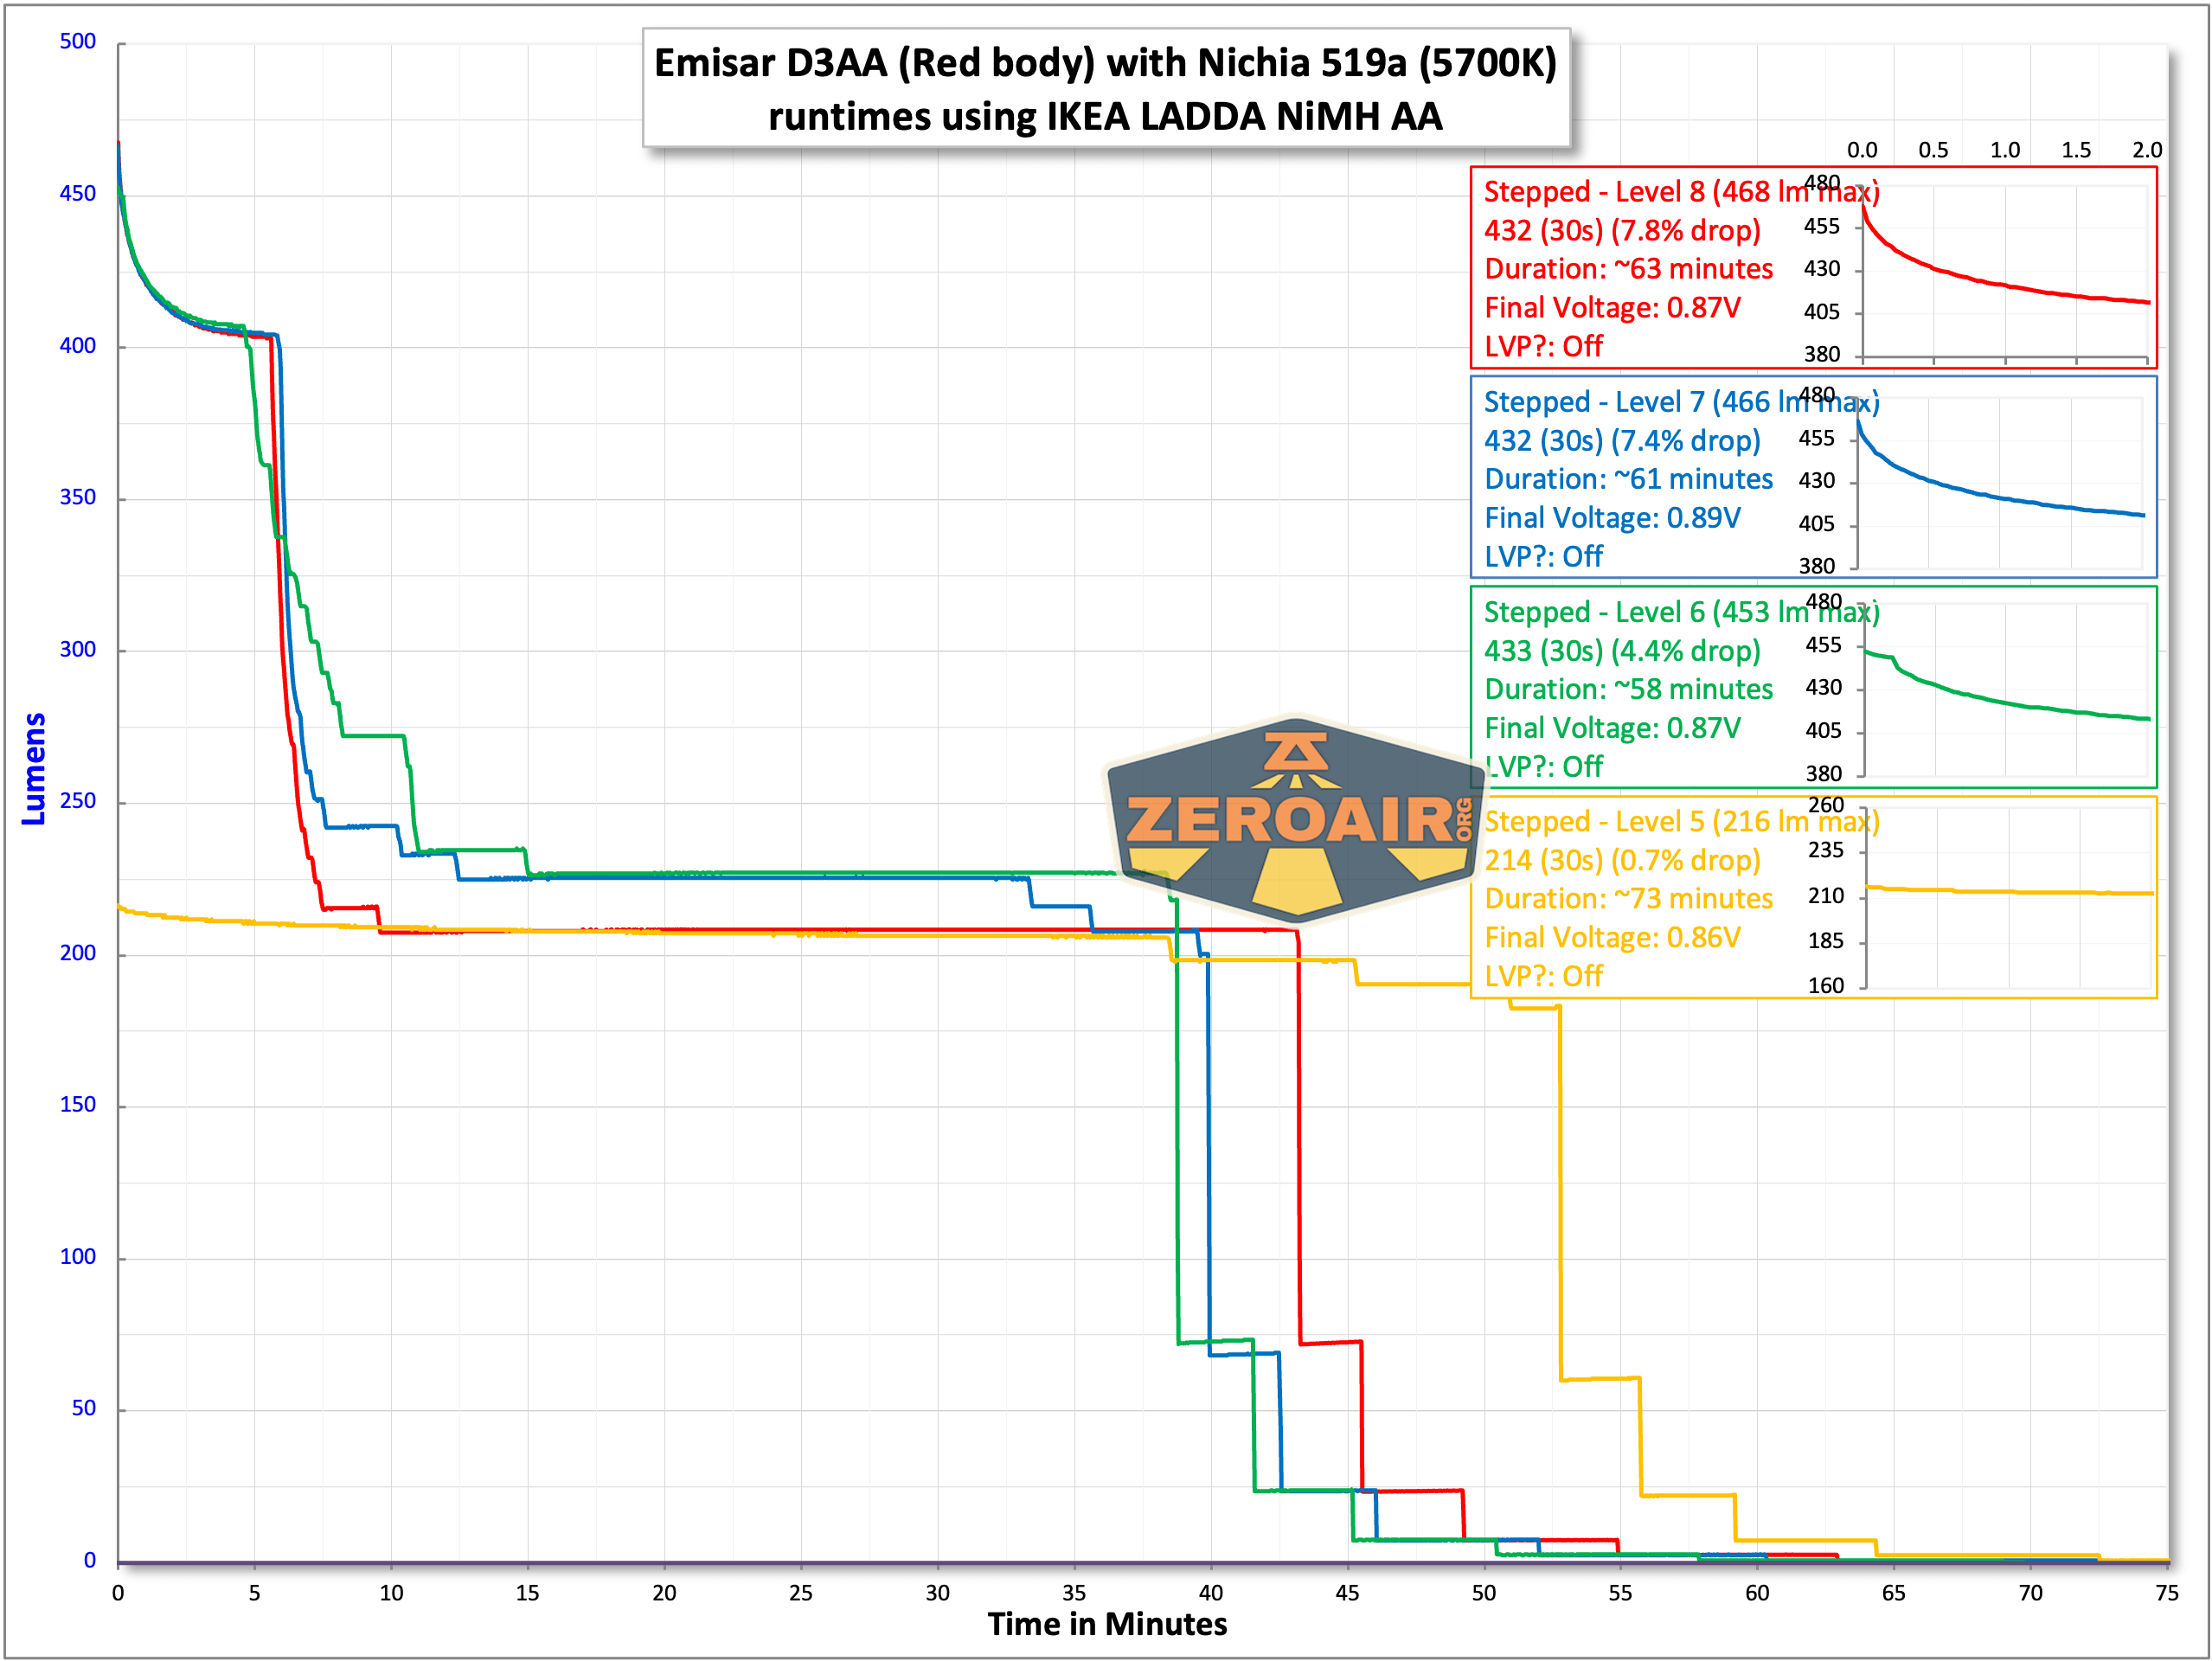
Apparently, ranges 6, 7, and eight appear to all have (round) the identical output (confirmed visually and with the lumen tube). That could possibly be resulting from NiMH limitations (although this cell has not more than 3 cost cycles – it’s new), or simply how the sunshine works. Both is okay with me, as a result of, once more, 350 lumens or so could be very helpful!

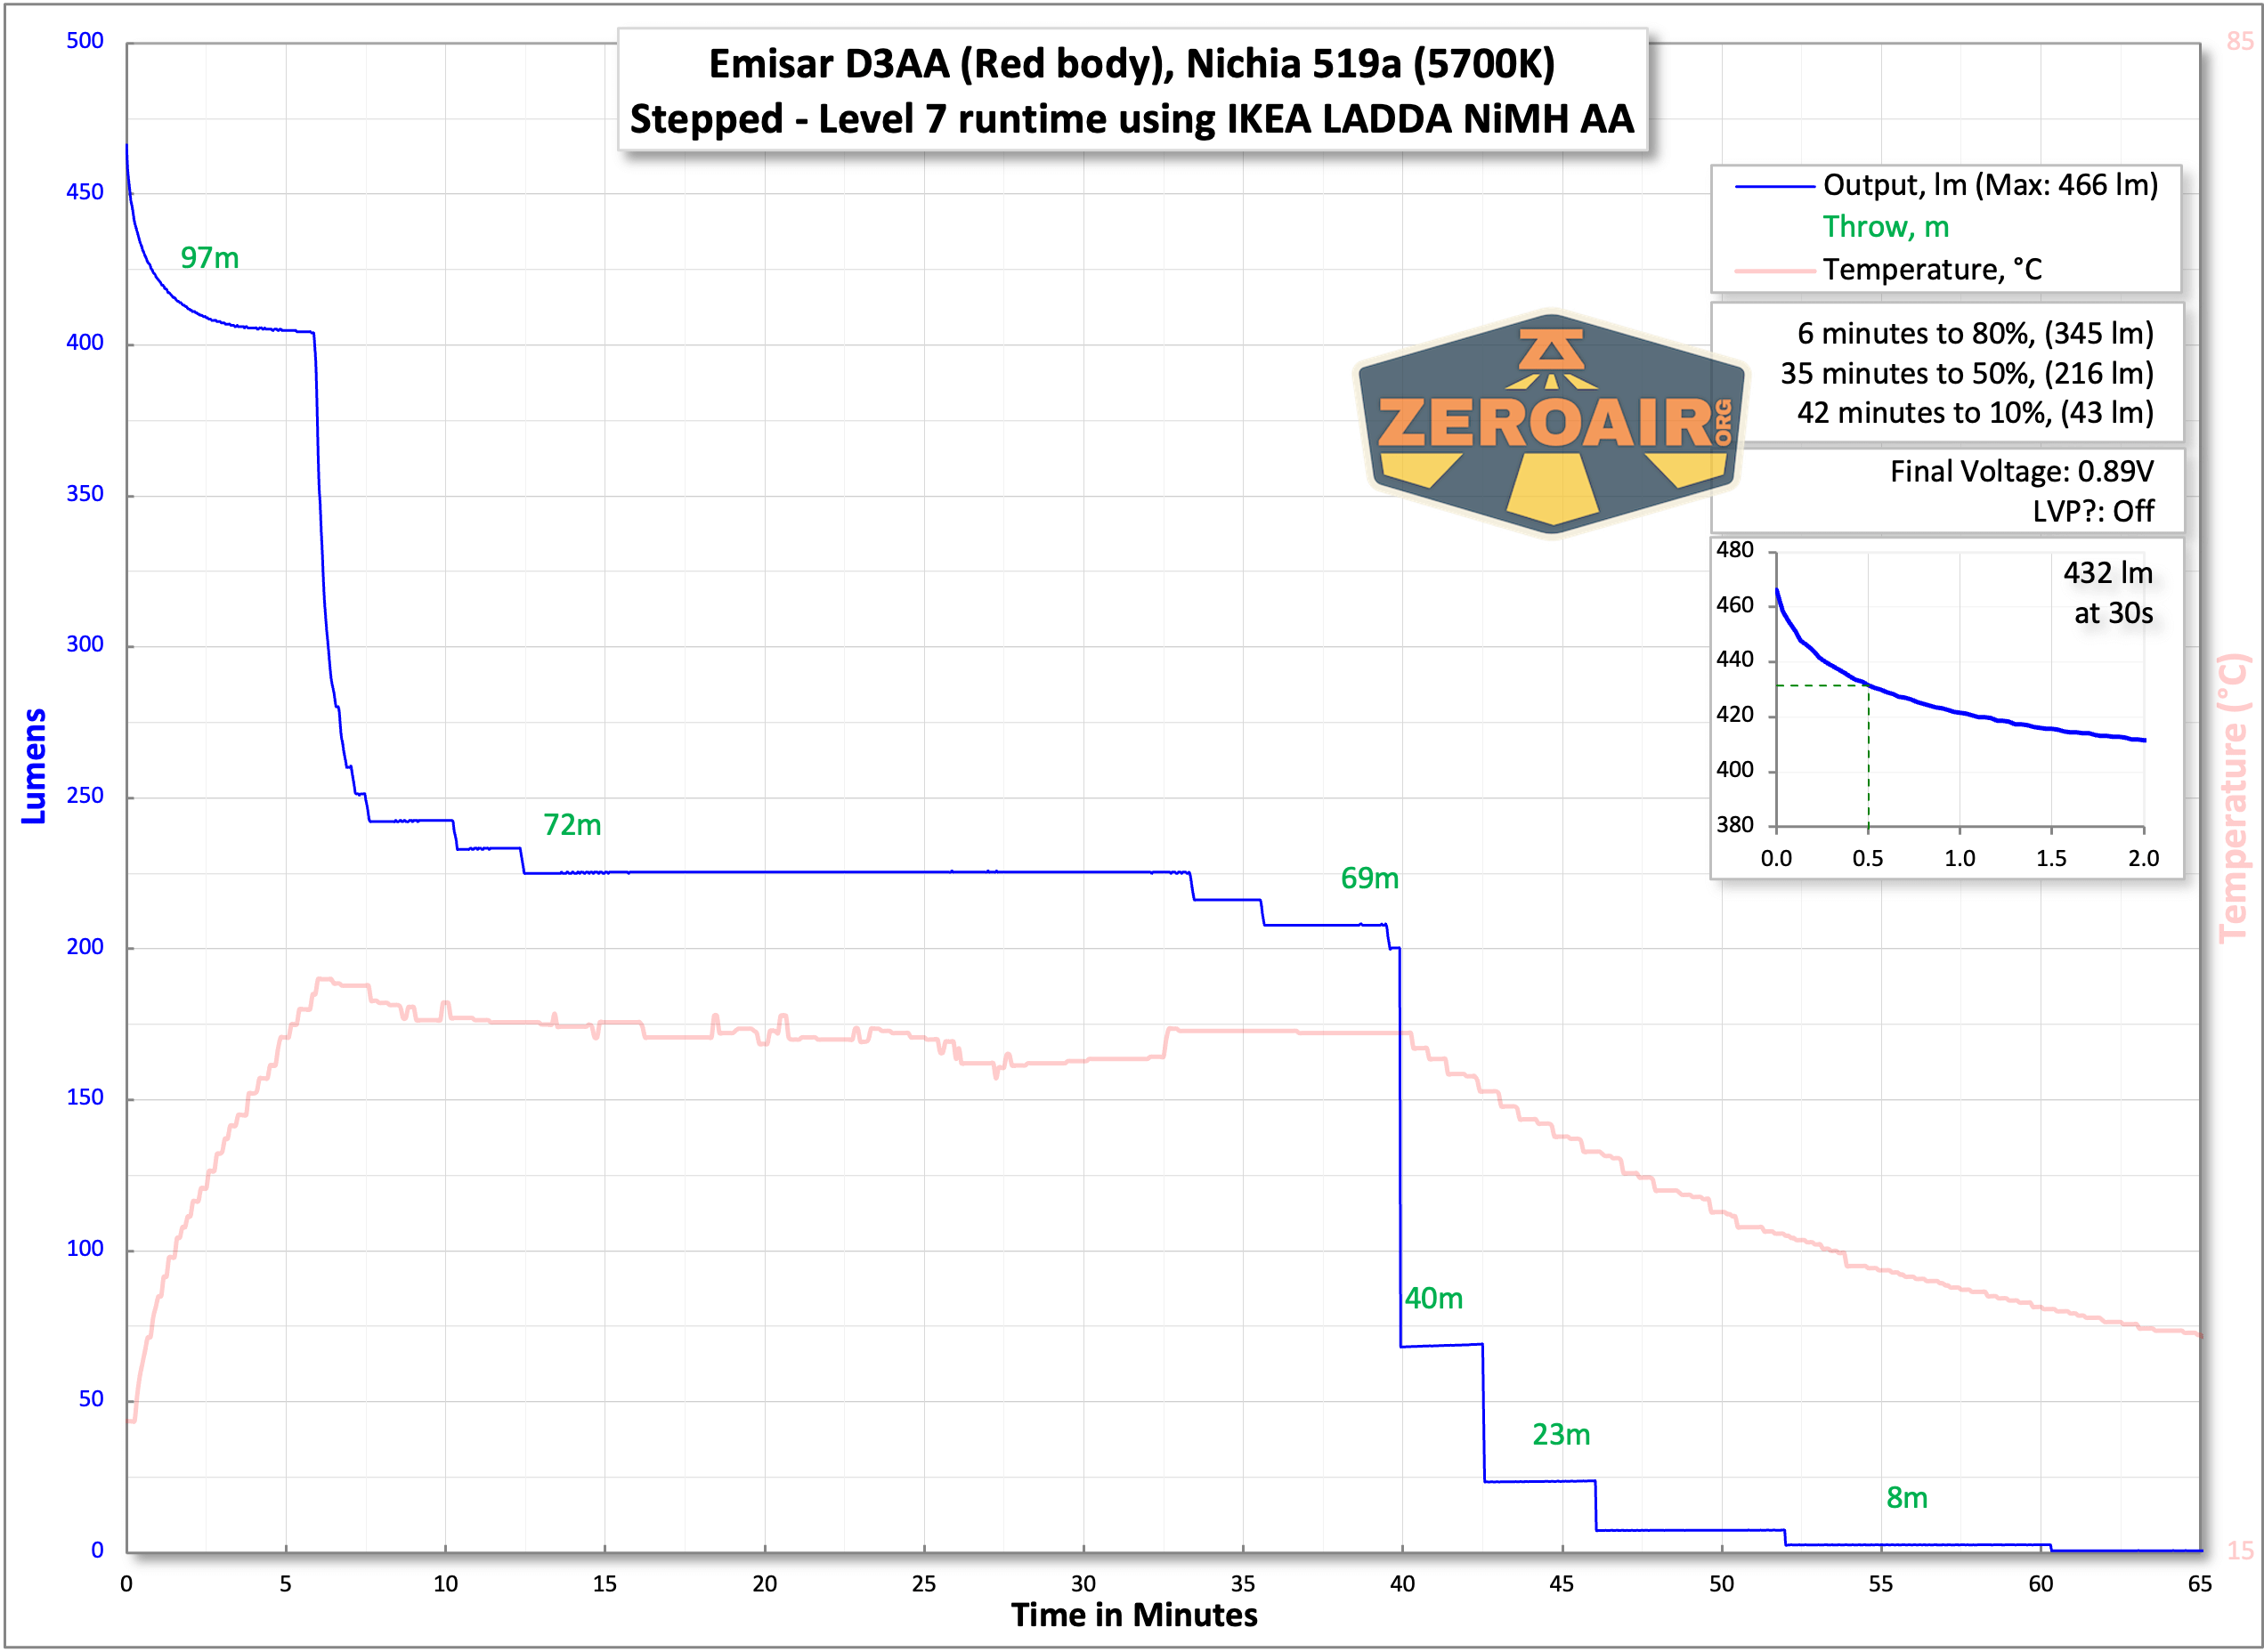


The Emisar D3AA 5700K flashlight appears to additionally shut off with low voltage safety when utilizing a NiMH cell too, at round 1V.
Modes and Currents
| Mode | Mode Claimed Output (lm) | Claimed Runtime | Measured Lumens | Tailcap Amps |
|---|---|---|---|---|
| 14500 Stage 8 – Stepped | 1540 (for domed possibility – this check is dedomed possibility!) | – | 1280 (0s) 879 (30s) |
5.11 |
| 14500 Stage 7 – Stepped | – | – | 813 (0s) 792 (30s) |
2.69 |
| 14500 Stage 6 – Stepped | – | – | 459 (os) 449 (30s) |
1.34 |
| 14500 Stage 5 – Stepped | – | – | 225 | 0.59 |
| 14500 Stage 4 – Stepped | – | – | 89 | 0.22 |
| 14500 Stage 3 – Stepped | – | – | 27 | 0.065 |
| 14500 Stage 2 – Stepped | – | – | 4.1 | [low] |
| 14500 Stage 1 – Stepped | – | – | 0.07 | [low] |
| NiMH AA Stage 8 – Stepped | 510 (for domed possibility – this check is dedomed possibility!) | – | 468 (0s) 432 (30s) |
5.45 |
| NiMH AA Stage 7 – Stepped | – | – | 466 (0s) 432 (30s) |
5.45 |
| NiMH AA Stage 6 – Stepped | – | – | 453 (0s) 433 (30s) |
4.96 |
| NiMH AA Stage 5 – Stepped | – | – | 216 | 1.87 |
| NiMH AA Stage 4 – Stepped | – | – | 91 | 0.69 |
| NiMH AA Stage 3 – Stepped | – | – | 27 | 0.22 |
| NiMH AA Stage 2 – Stepped | – | – | 4.1 | 0.02 |
| NiMH AA Stage 1 – Stepped | – | – | 0.6 | [low] |
Pulse Width Modulation
This “high-efficiency increase driver” doesn’t use PWM on any mode with both kind of cell. That’s wonderful!!
Right here you may see a “baseline” – a chart with virtually no gentle hitting the sensor.
Then there’s the Ultrafire WF-602C flashlight, which has among the worst PWM I’ve seen. It’s so dangerous that I used a put up about it to elucidate PWM! Listed below are a number of timescales (10ms, 5ms, 2ms, 1ms, 0.5ms, 0.2ms) to make evaluating this “worst” PWM gentle to the check gentle simpler. That put up additionally explains why I didn’t check the WF-602C on the traditional 50us scale.
Consumer Interface and Operation
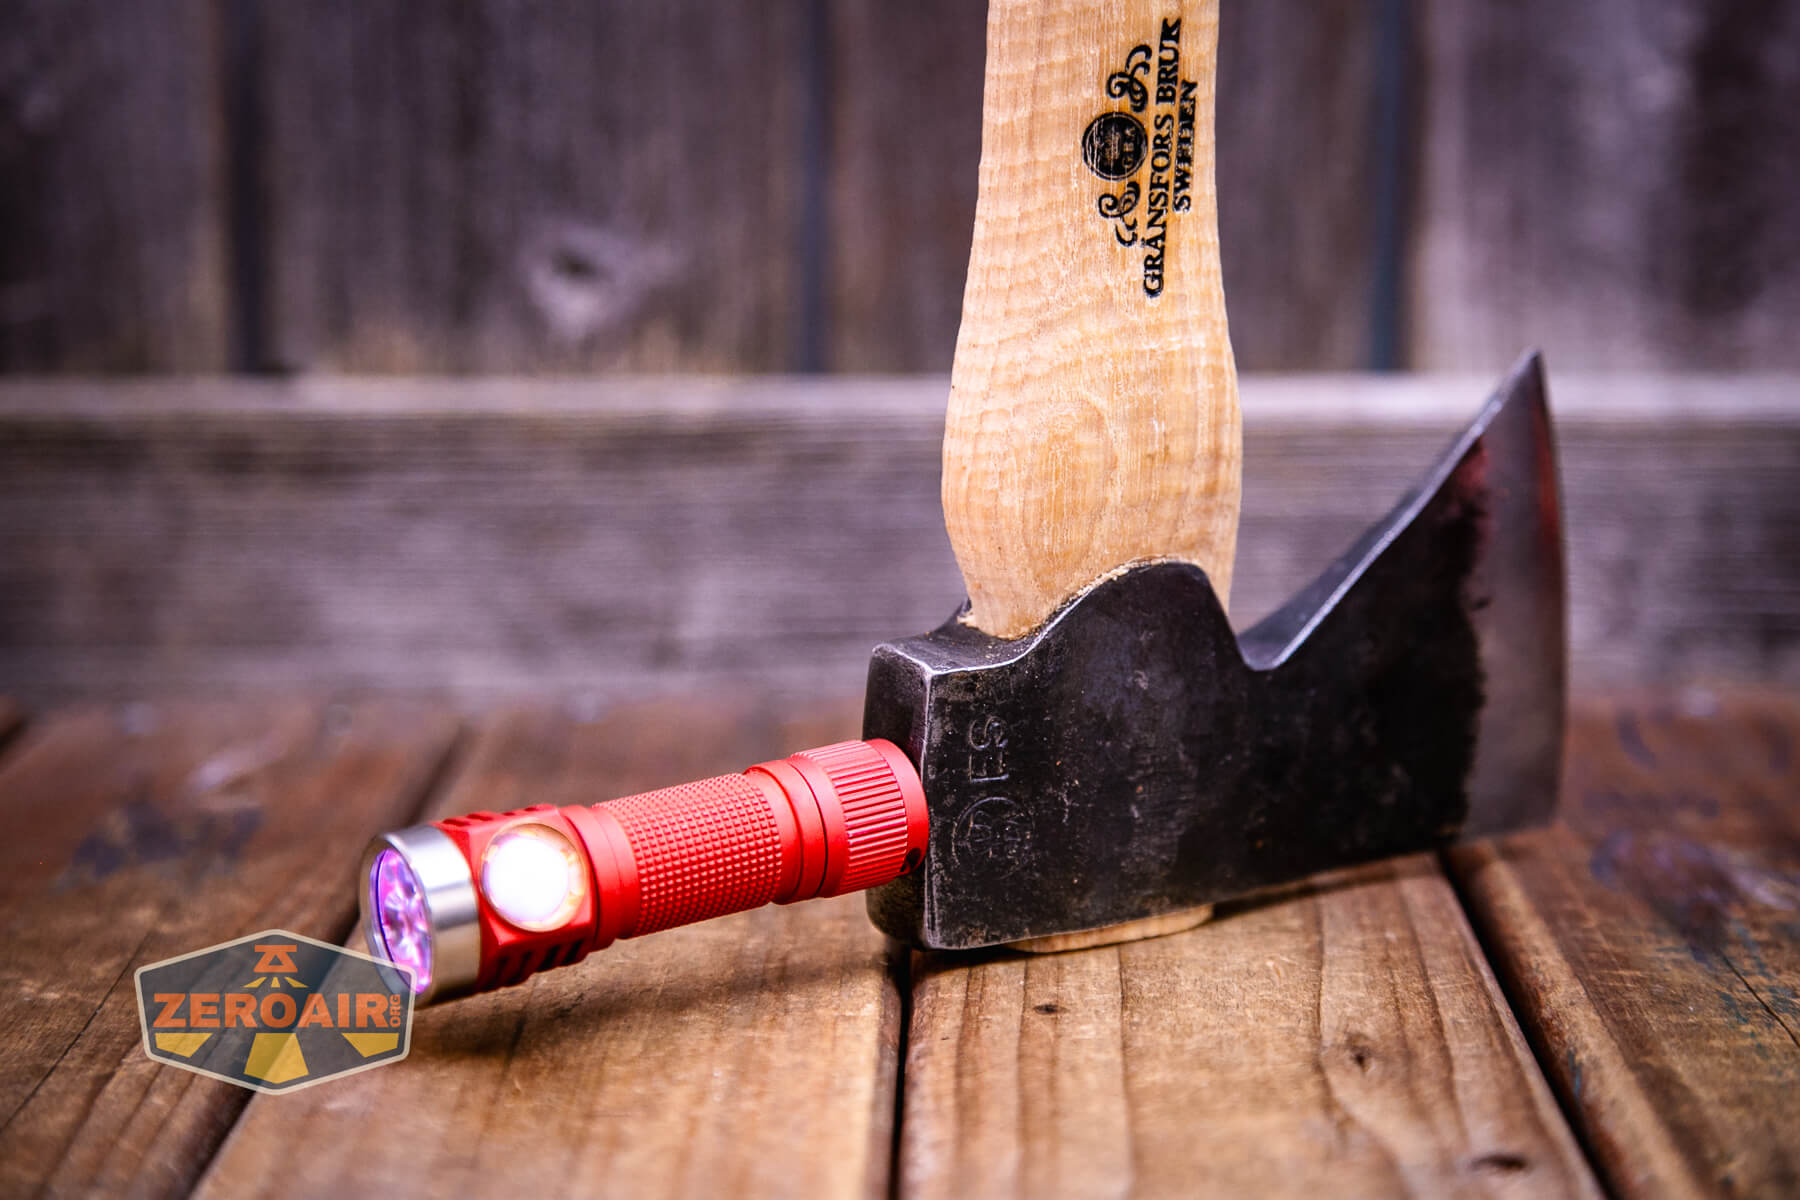
There’s one change on the D3AA. It’s a facet e-switch, with 4 white indicating LEDs. It’s quiet however very clicky, and the rubber cowl is good and grippy. Many backlight colours can be found!
This gentle ships with Andúril 2 by ToyKeeper. Andúril is an especially versatile consumer interface!

Andúril2 is nice, and I feel it’s an enchancment over the primary iteration(s). There are some issues some customers won’t love about it, however I feel general it’s far more approachable. I’ll notice although that the nomenclature is likely to be a bit complicated – the sunshine (all lights with Andúril2) ships in Easy UI. This isn’t Muggle Mode. It’s possible you’ll suppose “Properly duh” and by now you’ve already seen the blistering runtime on turbo of Easy, so that you get it. However simply remember, don’t hand this gentle to the uninitiated pondering they received’t set their hand on fireplace whereas utilizing Easy UI. Right here is the place I’d let you know the right way to change to muggle mode. There is no such thing as a muggle mode.
Right here’s a consumer interface desk!
A more recent and up-to-date model might be seen right here:
https://github.com/ToyKeeper/anduril/blob/trunk/docs/anduril-manual.md
For the reason that guide (linked above) has modified, I must undergo all of it once more to substantiate that this desk is the “most proper.” Lights ship with revisions on a regular basis anyway, so that you would possibly even get an up to date model from what I’ve.
The desk beneath is direct and in full from ToyKeeper. All actions might not apply to all lights, together with the one on this assessment. The desk is the model from 20241229. It’s a bit completely different from my traditional consumer interface desk format, however I’m preserving all the data from GitHub right here.
This can be a desk of all button mappings in Anduril, in a single place:
| Mode | UI | Button | Motion |
|---|---|---|---|
| Off | Any | 1C |
On (ramp mode, memorized degree) |
| Off | Any | 1H |
On (ramp mode, ground degree) |
| Off | Any | 2C |
On (ramp mode, ceiling degree) |
| Off | Easy | 2H |
On (momentary ceiling degree) |
| Off | Full | 2H |
On (momentary turbo) |
| Off | Any | 3C |
Battcheck mode |
| Off | Full | 3H |
Strobe mode (whichever was used final) |
| Off | Any | 4C |
Lockout mode |
| Off | Full | 5C |
Momentary mode |
| Off | Full | 6C |
Tactical mode |
| Off | Full | 7C |
Aux LEDs: Subsequent sample |
| Off | Full | 7H |
Aux LEDs: Subsequent shade |
| Off | Full | 9H |
Misc Config menu (varies per gentle): ?1: tint ramp fashion ?2: jump-start degree |
| Off | Full | 10C |
Allow Easy UI |
| Off | Easy | 10H |
Disable Easy UI |
| Off | Full | 10H |
Easy UI ramp config menu: 1: ground 2: ceiling 3: steps 4: turbo fashion |
| Off | Any | 13H |
Manufacturing unit reset (on some lights) |
| Off | Any | 15+C |
Model examine |
| Ramp | Any | 1C |
Off |
| Ramp | Any | 1H |
Ramp (up, with reversing) |
| Ramp | Any | 2H |
Ramp (down) |
| Ramp | Any | 2C |
Go to/from ceiling or turbo (configurable) |
| Ramp | Full | 3C |
Change ramp fashion (easy / stepped) |
| Ramp | Full | 6C |
(similar as above, however on multi-channel lights) |
| Ramp | Full | 3H |
Momentary turbo (when no tint ramping) |
| Ramp | Full | 4H |
Momentary turbo (on multi channel lights) |
| Ramp | Any | 4C |
Lockout mode |
| Ramp | Full | 5C |
Momentary mode |
| Ramp | Full | 5H |
Sundown timer on, and add 5 minutes |
| Ramp | Full | 7H |
Ramp config menu: (for present ramp) 1: ground 2: ceiling 3: pace / steps |
| Ramp | Full | 10C |
Activate guide reminiscence and save present brightness |
| Ramp | Full | 10H |
Ramp Extras config menu: 1: change to computerized mem, not guide mem 2: set guide mem timeout 3: ramp after moon or not 4: superior UI turbo fashion 5: easy steps |
Multi-channel Lights
| Mode | UI | Button | Multi-channel lights solely! |
|---|---|---|---|
| Any | Any | 3C |
Subsequent channel mode (i.e. subsequent shade mode) |
| Any | Any | 3H |
Tint ramp (if this mode can) |
| Any | Full | 9H |
Channel mode allow/disable menu: N: click on (or not) to allow (disable) mode N |
Lockout Mode
| Mode | UI | Button | Motion |
|---|---|---|---|
| Lockout | Any | 1C/1H |
Momentary moon (lowest ground) |
| Lockout | Any | 2C/2H |
Momentary moon (highest ground, or guide mem degree) |
| Lockout | Any | 3C |
Unlock (go to “Off” mode) |
| Lockout | Any | 3H |
Subsequent channel mode (if a couple of enabled) |
| Lockout | Any | 4C |
On (ramp mode, memorized degree) |
| Lockout | Any | 4H |
On (ramp mode, ground degree) |
| Lockout | Any | 5C |
On (ramp mode, ceiling degree) |
| Lockout | Full | 7C |
Aux LEDs: Subsequent sample |
| Lockout | Full | 7H |
Aux LEDs: Subsequent shade |
| Lockout | Full | 10H |
Auto-lock config menu: 1: set timeout in minutes (0 = no auto-lock) |
Strobe Group Modes
| Mode | UI | Button | Motion |
|---|---|---|---|
| Strobe (any) | Full | 1C |
Off |
| Strobe (any) | Full | 2C |
Subsequent strobe mode |
| Strobe (any) | Full | 3C |
Subsequent channel mode (saved per strobe mode) |
| Strobe (any) | Full | 4C |
Prev strobe mode |
| Strobe (any) | Full | 5C |
Momentary mode (utilizing present strobe) |
| Social gathering strobe | Full | 1H/2H |
Quicker / slower |
| Tactical strobe | Full | 1H/2H |
Quicker / slower |
| Police strobe | – | – | None (brightness is Ramp Mode’s last-used degree) |
| Lightning | Full | 1H |
Interrupt present flash or begin new one |
| Candle | Full | 1H/2H |
Brighter / dimmer |
| Candle | Full | 5H |
Sundown timer on, add 5 minutes |
| Biking | Full | 1H/2H |
Brighter / dimmer |
Blinky Modes
| Mode | UI | Button | Motion |
|---|---|---|---|
| Batt examine | Any | 1C |
Off |
| Batt examine | Full | 2C |
Subsequent blinky mode (Temp examine, Beacon, SOS) |
| Batt examine | Full | 3C |
Subsequent channel mode (for quantity blinks solely) |
| Batt examine | Full | 7H |
Voltage config menu 1: voltage correction issue … 5: -0.10V 6: -0.05V 7: no correction 8: +0.05V 9: +0.10V … 2: post-off voltage show seconds |
| Temp examine | Full | 1C |
Off |
| Temp examine | Full | 2C |
Subsequent blinky mode (Beacon, SOS, Batt examine) |
| Temp examine | Full | 7H |
Thermal config menu 1: set present temperature 2: set temperature restrict |
| Beacon | Full | 1C |
Off |
| Beacon | Full | 1H |
Configure beacon timing |
| Beacon | Full | 2C |
Subsequent blinky mode (SOS, Batt examine, Temp examine) |
| SOS | Full | 1C |
Off |
| SOS | Full | 2C |
Subsequent blinky mode (Batt examine, Temp examine, Beacon) |
Momentary Mode
| Mode | UI | Button | Motion |
|---|---|---|---|
| Momentary | Full | Any | On (till button is launched) |
| Momentary | Full | Disconnect energy | Exit Momentary mode |
Tactical Mode
| Mode | UI | Button | Motion |
|---|---|---|---|
| Tactical | Full | 1H |
Excessive (tactical slot 1) |
| Tactical | Full | 2H |
Low (tactical slot 2) |
| Tactical | Full | 3H |
Strobe (tactical slot 3) |
| Tactical | Full | 6C |
Exit (return to Off Mode) |
| Tactical | Full | 7H |
Tactical Mode config menu: 1: tactical slot 1 2: tactical slot 2 3: tactical slot 3 |
Config Menus
| Mode | UI | Button | Motion |
|---|---|---|---|
| Config menus | Full | Maintain | Skip present merchandise with no modifications |
| Config menus | Full | Launch | Configure present merchandise (goes to Quantity Entry menu) |
| Quantity entry | Full | Click on | Add 1 to worth for present merchandise |
| Quantity entry | Full | Maintain | Add 10 to worth for present merchandise |
LED and Beam
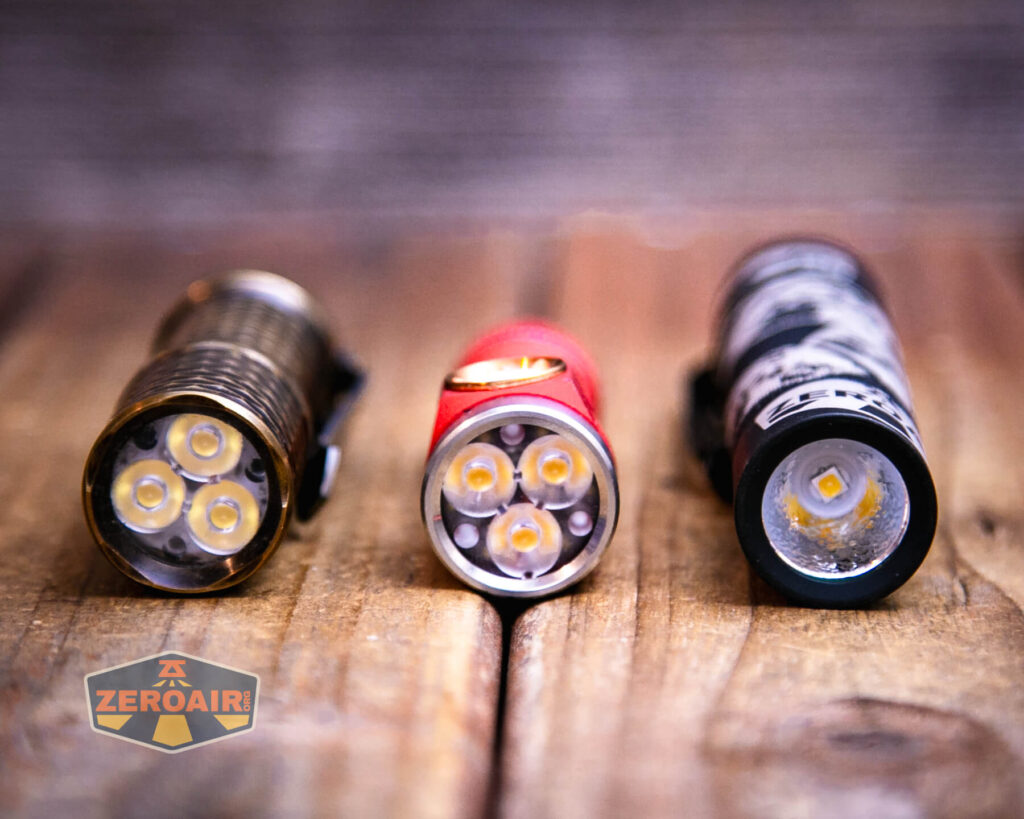
There are three emitters within the Emisar D3AA 5700K flashlight – it’s a triple! These are Nichia 519a 5700K emitters (unbelievable) however they’re additionally dedomed (unbelievable) which makes them hotter than the claimed 5700K (unbelievable.) I really like all of the issues about this distinction!
There are additionally secondary emitters in there.

LED Colour Report (CRI and CCT)
Output (in CCT) ranges from round 4000K to 4300K with the 14500 and stays proper at 4000K to 4200K with a 1.5V cell. This actually tracks for these being dedomed emitters – dedoming sometimes (at all times?) lowers the CCT. CRI could be very excessive, at over 95 throughout the board. No complaints right here, and so much to like.
CCT (Correlated Colour Temperature) refers back to the measurement of the colour look of sunshine, expressed in Kelvins (Okay), which signifies whether or not the sunshine is heat (yellowish) or cool (bluish). A decrease CCT (beneath 3000K) is taken into account heat gentle, whereas a better CCT (above 5000K) offers cooler, bluish gentle.
CRI (Colour Rendering Index) is a measure of how precisely a lightweight supply renders colours compared to pure daylight. Scored on a scale from 0 to 100, greater CRI values point out that colours seem extra true to life and vibrant, just like how they’d look below the solar.
Beamshots
These beamshots are at all times with the next settings: f8, ISO100, 0.3s shutter, and guide 5000K publicity. These photographs are taken at ground degree and the beam hits the ceiling round 9 ft away.
Tint vs BLF-348 (KillzoneFlashlights.com 219b model) (affiliate hyperlink)
I hold the check flashlight on the left, and the BLF-348 reference flashlight on the fitting. These photographs are taken round 18 inches from the door.
I evaluate every little thing to the KillzoneFlashlights.com 219b BLF-348 as a result of it’s cheap and has the very best tint!
Abstract and Conclusion
I really like the Emisar D3AA 5700K flashlight – far more than I assumed I’d. I exploit a D4V2 each day and find it irresistible, so it ought to come as no shock that the D3AA could be nice too. However I nonetheless resisted for the longest time. There are so many choices although, that it may be complicated to select. At $35 or so, a minimum of the burden of “selecting improper” shouldn’t be TOO painful. This Emisar D3AA 5700K flashlight is an excellent possibility. For daytime use, I take into account this “5700K” (actually a lot hotter than 5700K as a result of dedome possibility) to be unbelievable. That the sunshine will run 1.5V cells too is a good bonus.
The Huge Desk
^ Measurement disclaimer: Testing flashlights is my interest. I exploit hobbyist-level gear for testing, together with some I made myself. Attempt to not get buried within the particulars of producer specs versus measurements recorded right here; A certain quantity of distinction (say, 10 or 15%) is completely affordable.
What I like
- Small dimension
- Many emitter choices
- Dedome possibility
- Can run 1.5V and 4.2V cells each
- No PWM
- Acquainted consumer interface
What I don’t like
Notes
Appreciated it? Take a second to help zeroair on Patreon!
