


What if you happen to may rework your 3D printing workflow right into a seamless, precision-driven course of with only one software? For fans and professionals alike, the journey from digital design to tangible creation typically hinges on the capabilities of slicing software program. Enter Creality Print 6, a sturdy resolution tailor-made to raise your 3D printing expertise. Whether or not you’re a newcomer navigating the fundamentals or a seasoned maker fine-tuning intricate designs, this software program guarantees to simplify the advanced whereas delivering outcomes that meet your exacting requirements. However how do you unlock its full potential? All of it begins with understanding its set up and core options.
On this complete walkthrough, you’ll uncover how you can arrange Creality Print 6, discover its intuitive interface, and harness its highly effective instruments to optimize your prints. From configuring important settings like layer peak and infill density to utilizing superior options akin to real-time printer monitoring, this information is designed to empower you at each step. You’ll additionally get a more in-depth have a look at the software program’s streamlined workflow tabs, which information you from mannequin preparation to slicing and machine administration with ease. By the tip, you’ll not solely have a agency grasp of Creality Print 6 but in addition a newfound confidence in your potential to carry your 3D creations to life. As a result of on this planet of 3D printing, mastery begins with the proper instruments, and the data to wield them successfully.
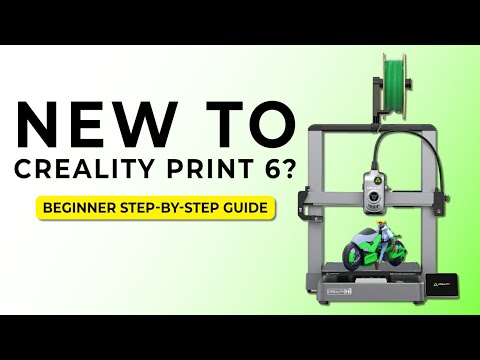
Creality Print 6 Overview
TL;DR Key Takeaways :
- Creality Print 6 is a strong slicing software program designed to streamline 3D printing workflows, providing customizable settings for optimum print high quality, sturdiness, and pace.
- The software program options an intuitive interface with key instruments like undo/redo buttons, printer profiles, and a 3D workspace for exact mannequin positioning and orientation.
- Its workflow is organized into three major tabs: Put together (mannequin setup and settings), Preview (G-code slicing and inspection), and System (printer connection and monitoring).
- Creality Print 6 helps USB and Wi-Fi connections, permitting real-time printer monitoring and management, with further options like distant commentary through onboard cameras.
- Superior instruments akin to a number of construct plates, undertaking administration, and cross-platform compatibility improve productiveness and help advanced 3D printing initiatives.
The Significance of Slicing Software program
Slicing software program is an integral part of 3D printing, performing because the middleman between your digital mannequin and the bodily printer. It interprets your 3D designs into G-code, the machine-readable directions that information the printer in creating objects layer by layer. Creality Print 6 simplifies this course of by providing a variety of customizable settings, together with layer peak, infill density, and print pace. By fine-tuning these parameters, you’ll be able to tailor your prints to satisfy particular necessities, whether or not you prioritize high quality, sturdiness, or pace. This degree of management ensures that your initiatives are optimized for the absolute best outcomes.
Creality Print 6 Set up & Overview Information
Getting began with Creality Print 6 is an easy course of. Observe these steps to obtain and set up the software program:
- Go to the official Creality web site at Crealitycloud.com.
- Find the obtain part and choose the model suitable together with your working system, Home windows, Mac, or Linux.
- Obtain the installer and run it in your pc.
- Observe the on-screen directions to finish the set up course of.
- Set your preferences, akin to language, default measurement models, and different preliminary settings.
- Create desktop shortcuts for fast and easy accessibility to the software program.
As soon as the set up is full, launch Creality Print 6 to start configuring your 3D printing setting.
Listed here are extra guides from our earlier articles and guides associated to Creality that you could be discover useful.
Navigating the Creality Print 6 Interface
The interface of Creality Print 6 is designed to be intuitive and user-friendly, making it accessible to each freshmen and superior customers. Upon opening the software program, you’ll encounter a digital print mattress the place you’ll be able to place and manipulate your 3D fashions. Key parts of the interface embody:
- Menus: Entry quite a lot of instruments, settings, and superior options to customise your workflow.
- Undo/Redo Buttons: Shortly appropriate errors or revisit earlier adjustments for environment friendly modifying.
- Printer Profiles: Handle a number of printers with ease by creating and saving profiles for every machine.
The 3D workspace permits you to zoom, pan, and rotate your mannequin utilizing your mouse, supplying you with full management over its placement and orientation. This flexibility ensures that your designs are completely aligned for printing.
Key Options & Workflow Tabs
Creality Print 6 organizes its performance into three major tabs, every designed to streamline a selected stage of the 3D printing course of:
- Put together Tab: Import your 3D fashions, modify print settings, and place objects on the digital construct plate. Customise parameters akin to layer peak, infill share, and print pace to match your undertaking’s necessities.
- Preview Tab: Slice your mannequin to generate G-code and examine the slicing course of utilizing a layer-by-layer preview. This function helps you establish and resolve potential points earlier than printing begins.
- System Tab: Hook up with your printer, monitor its standing, and handle a number of gadgets. View real-time info akin to filament utilization, nozzle temperature, and print progress.
These tabs present a logical and environment friendly workflow, guiding you from preliminary mannequin preparation to the ultimate phases of printing.
Connecting Your Printer to Creality Print 6
Creality Print 6 helps each USB and Wi-Fi connections, providing flexibility in the way you hyperlink your printer to the software program. To attach through Wi-Fi, comply with these steps:
- Be sure that your printer is powered on and linked to the identical community as your pc.
- Use the software program’s scanning function to detect obtainable printers on the community.
- Add your printer to the machine listing and make sure its standing throughout the software program.
As soon as linked, you’ll be able to monitor and management your printer remotely. In case your printer is provided with an onboard digital camera, you’ll be able to even observe the printing course of in actual time, ensuring that every thing proceeds easily.
Superior Instruments for Enhanced Productiveness
Creality Print 6 consists of a number of superior options designed to enhance effectivity and help advanced workflows. These instruments are notably helpful for knowledgeable customers managing a number of printers or intricate initiatives:
- A number of Construct Plates: Work on a number of initiatives concurrently by assigning fashions to completely different construct plates throughout the software program.
- Undertaking Administration: Set up your recordsdata, monitor print historical past, and save custom-made settings for a extra streamlined expertise.
- Cross-Platform Compatibility: Use the software program seamlessly throughout Home windows, Mac, and Linux working techniques, ensuring flexibility and accessibility.
These options empower customers to deal with large-scale or detailed initiatives with better ease and precision.
Streamlining Your Printing Workflow
Creality Print 6 simplifies the 3D printing course of, making it extra environment friendly and user-friendly. Right here’s an outline of the standard workflow:
- Import your 3D mannequin into the software program and place it on the digital construct plate.
- Regulate key settings akin to layer peak, infill density, and print pace to optimize the print in your particular wants.
- Slice the mannequin to generate G-code, utilizing the preview function to examine the slicing course of and establish potential points.
- Ship the G-code file to your printer and monitor the progress by means of the software program’s interface.
Through the printing course of, you may make real-time changes to make sure the absolute best outcomes. This degree of management permits you to handle any points that will come up with out interrupting the workflow.
Maximizing the Potential of Creality Print 6
Creality Print 6 is a flexible and user-friendly software that allows customers to take full management of their 3D printing initiatives. By following this information, you’ll be able to confidently set up the software program, navigate its intuitive interface, and use its superior options to attain exact and environment friendly prints. Whether or not you’re managing a single printer or a fleet of gadgets, Creality Print 6 gives the instruments and adaptability wanted to achieve the ever-evolving world of 3D printing.
Media Credit score: DraftID
Filed Beneath: Guides
Newest Geeky Devices Offers
Disclosure: A few of our articles embody affiliate hyperlinks. For those who purchase one thing by means of one in all these hyperlinks, Geeky Devices could earn an affiliate fee. Study our Disclosure Coverage.