
REVIEW – In the event you that overview headline appears acquainted, you’re not imagining issues. In July ’24 I reviewed the Swytch Go, additional again was the Swytch Air in January ’23, and in November ’19, the Swytch Common eBike Package, AKA the one which began all of it. This time round Swytch has advanced the battery system that began with the Air, whereas maintaining most of the acquainted parts that proceed to maintain working simply tremendous. One of many massive adjustments right here is the headlight constructed into the battery. Let’s dive in.
⬇︎ Leap to abstract (execs/cons)
Value: from $1,300 (£1,000) relying on battery measurement and element choice. Huge reductions (like as much as 50%) will be had by pre-ordering for his or her subsequent manufacturing run, so don’t let that value scare you an excessive amount of.
The place to purchase: Swytchbike
What’s it?
The Swytch Max+, additionally referred to as a Common eBike Package when searching their website, is a complete package that converts an current bicycle into an eBike. It’s a comparatively easy meeting course of that nearly anybody will be capable of do. The total package features a wheel with hub motor, a small show, and a handlebar mounted controller/clamp that securely holds one of many Max batteries and a cadence/pedal sensor.
What’s included?
Since I’ve reviewed a few these Swytch system now, I solely wanted the elements to transform a previous construct to the brand new tech. Because of this I acquired…
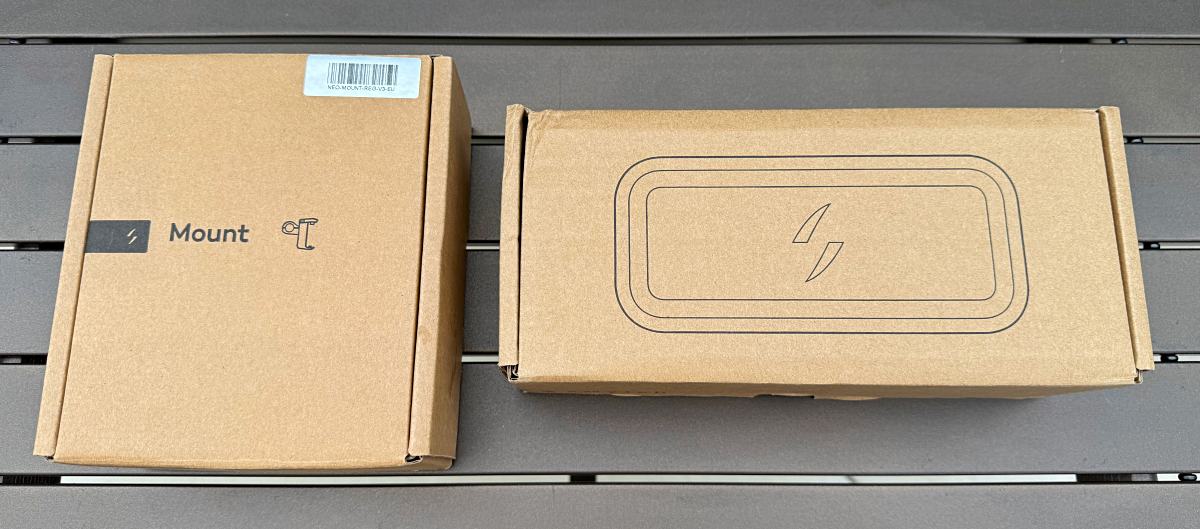
- Max + Battery
- Handlebar Battery Mount
In the event you have been to order a full package, you’d additionally obtain a wheel with built-in hub motor, digital show/swap with thumb controls, and a pedal sensor with cabling. You’ll be able to see all of those within the Meeting part under.
Tech specs
Max Battery Pack Choices
– MAX: 180 Wh | 228mm x 100mm x 35.5mm | 2.5h cost from commonplace 2A charger
– MAX+: 274.5 Wh | 228mm x 100mm x 74mm| 4h cost from commonplace 2A charger
– MAX+: 361.8 Wh | 228mm x 100mm x 74mm| 5.4h cost from commonplace 2A charger
Spec4
Design and options
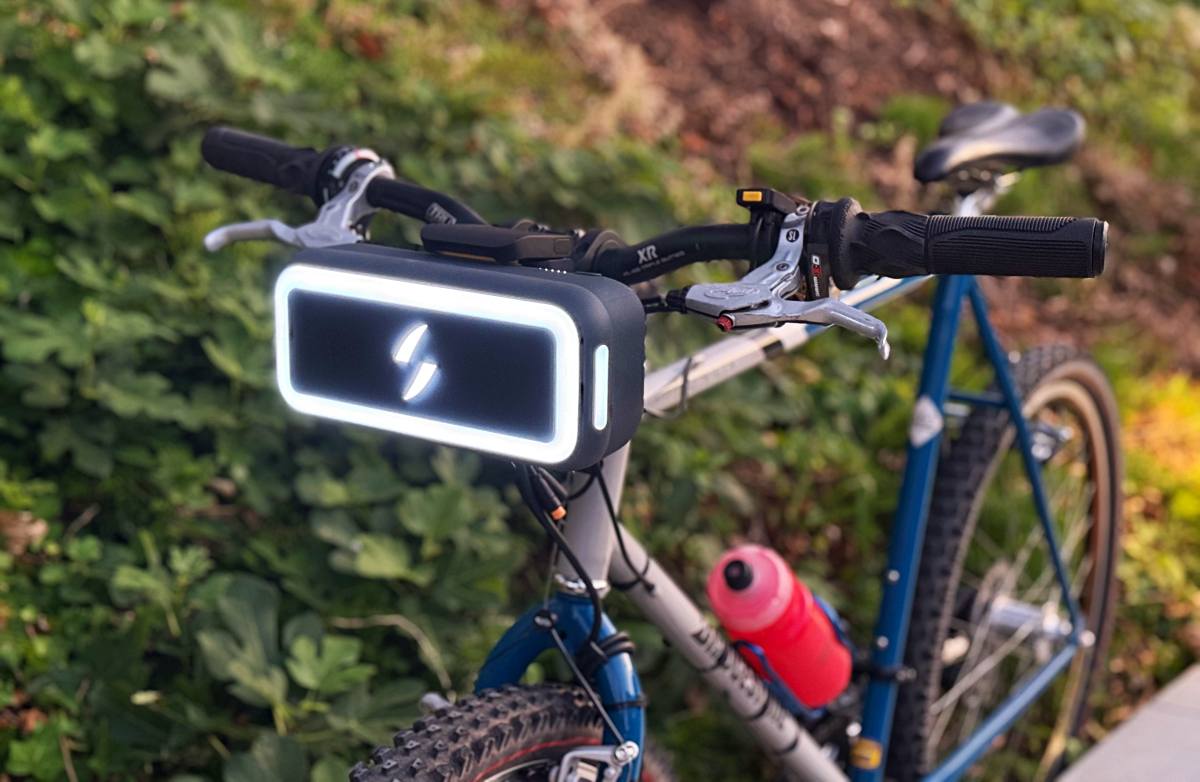
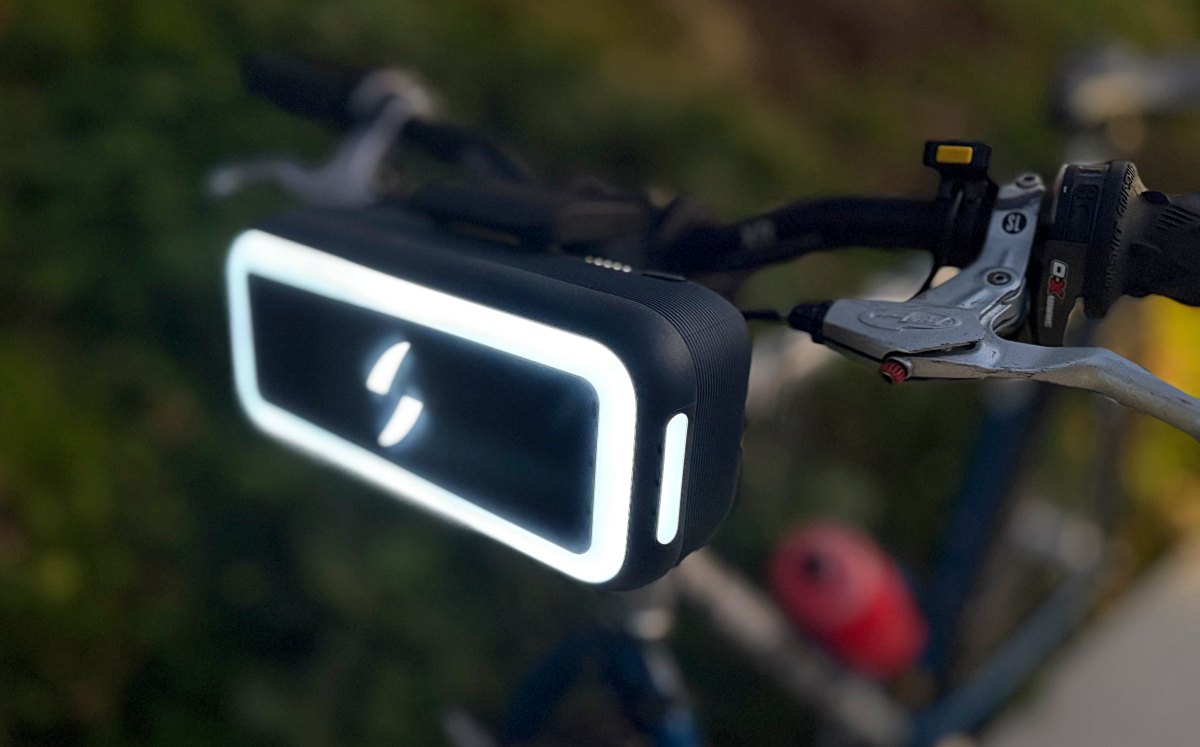
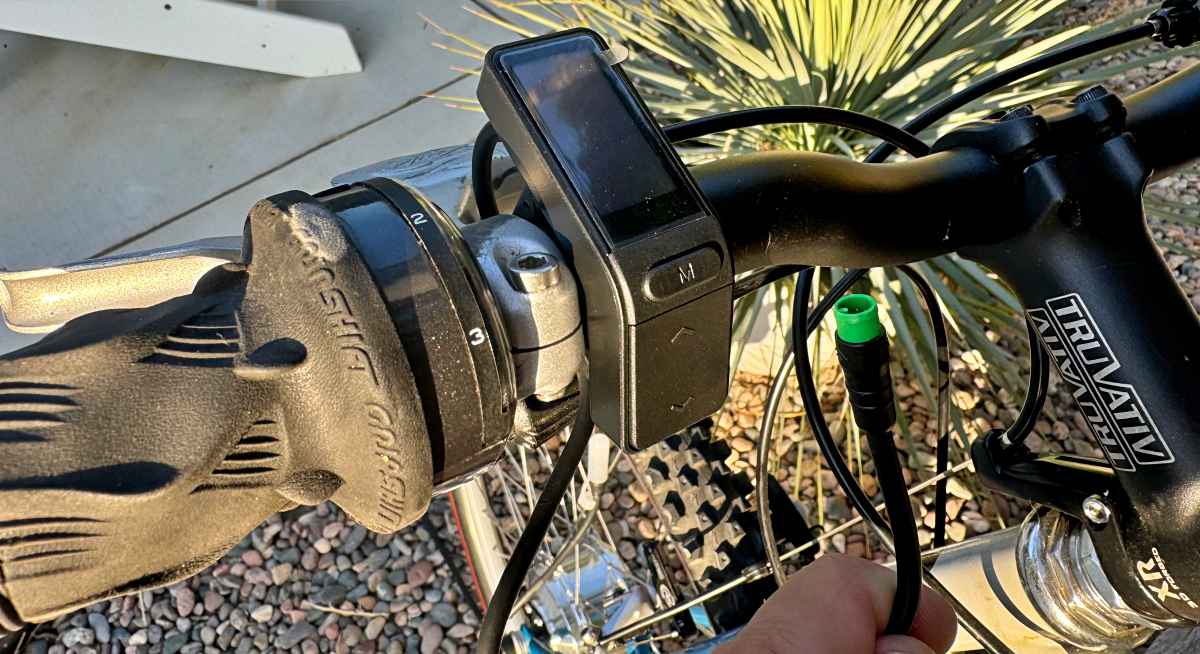
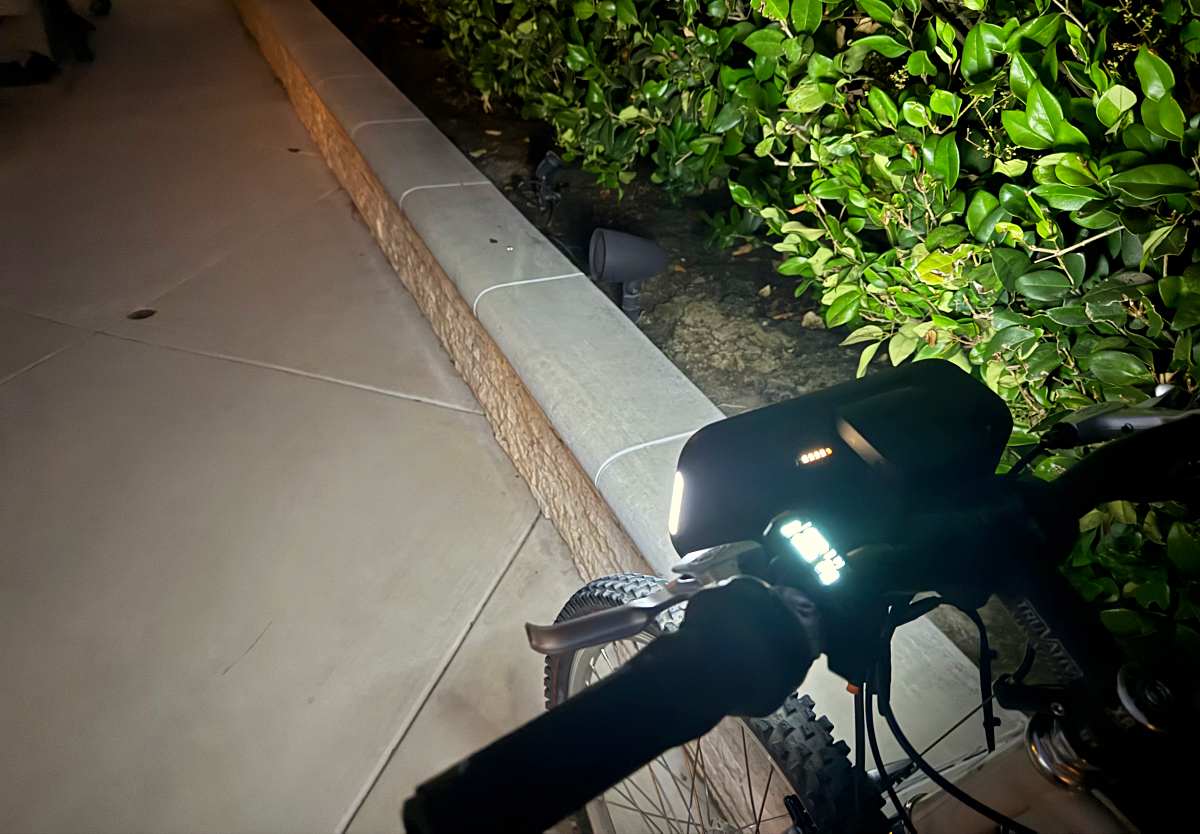
As talked about up above, the large replace is the inclusion of the headlight. It’s fairly vivid, and between the ahead illumination and the sunshine bar on both sides, it’s going to undoubtedly support in ensuring others (particularly vehicles) see you.
The mount homes the controller and installs onto your handlebars, connecting to the motor and your cadence/pedal sensor letting the system work as a complete. The extra cables hanging down enable for the addition of brake sensors and/or exterior lights.

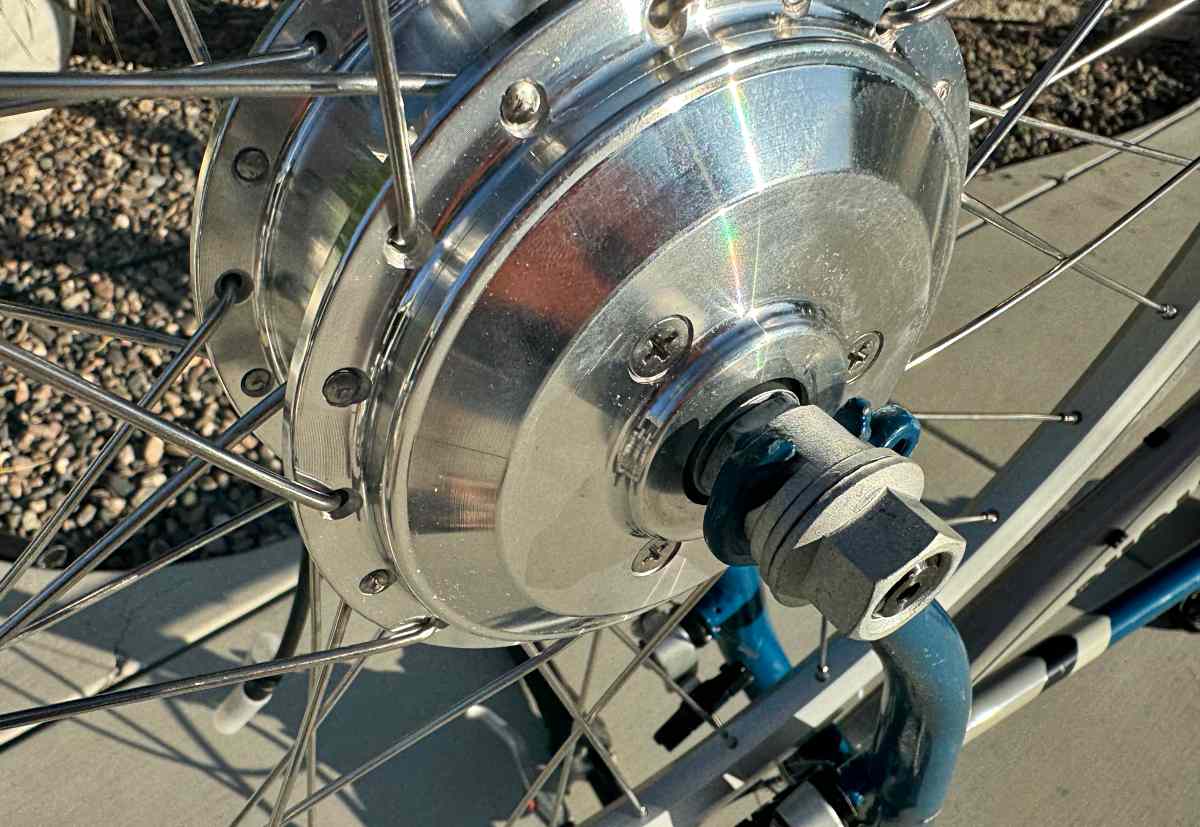
A entrance wheel with built-in motor hub is a part of the total package. This can be a wheel I acquired with a previous package. It’s tremendous clear polished silver put in right into a silver 26″ rim to facilitate a classic construct I used to be doing on the time. Whenever you order, you’ll specify wheel measurement and brake kind. The common nature of their wheel choices enable assist for nearly any bike.
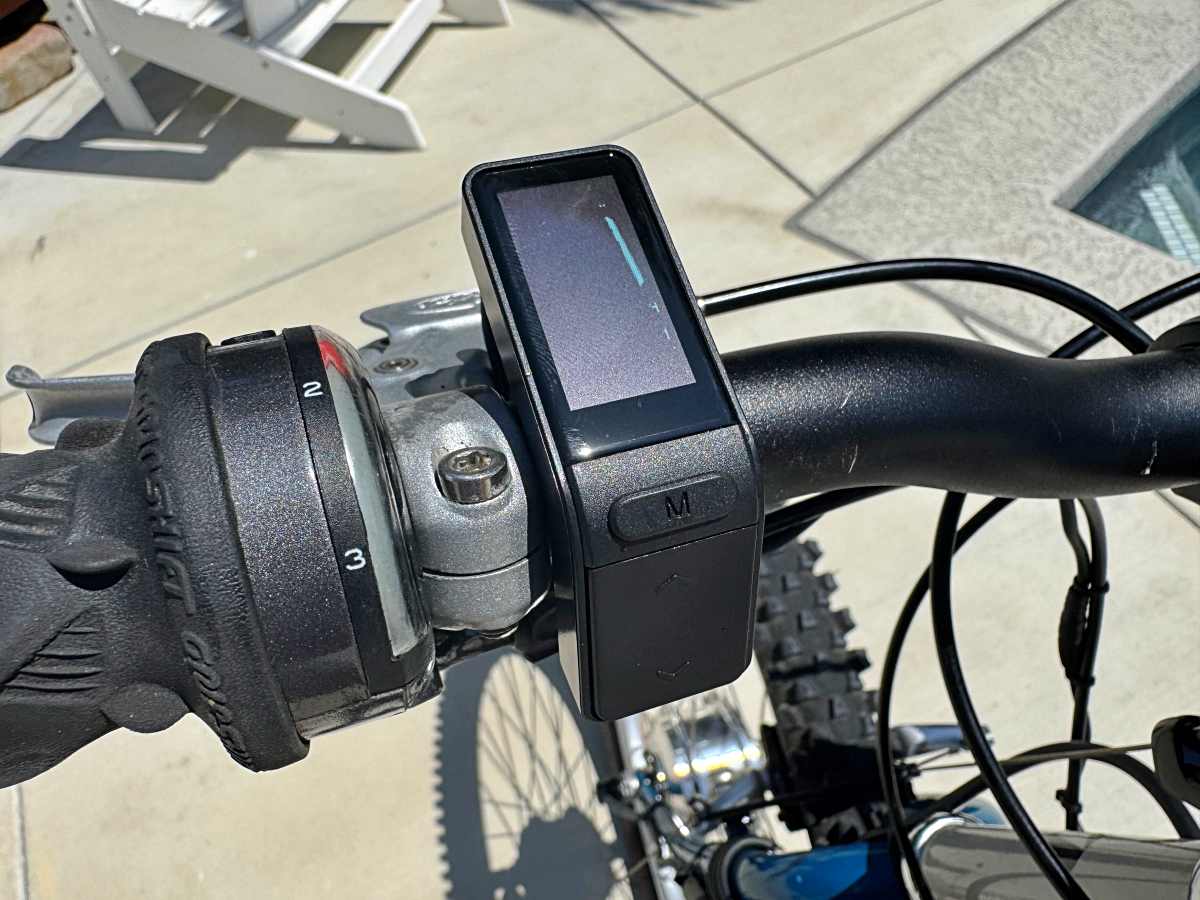
The opposite key piece you’ll obtain is the handlebar show. This allows you to energy on/off, regulate your help ranges, and offers key information like velocity and distance. The refresh price of the show makes it actually tough to take pictures of whereas on (in order that’s not a glitch within the photograph).
Meeting, Set up, Setup
Let’s set it up. In the event you’re beginning together with your favourite “analog” bike, you’ll begin by eradicating the present entrance wheel and taking that tire and tube off. Set up these in your new entrance wheel with the hub motor.
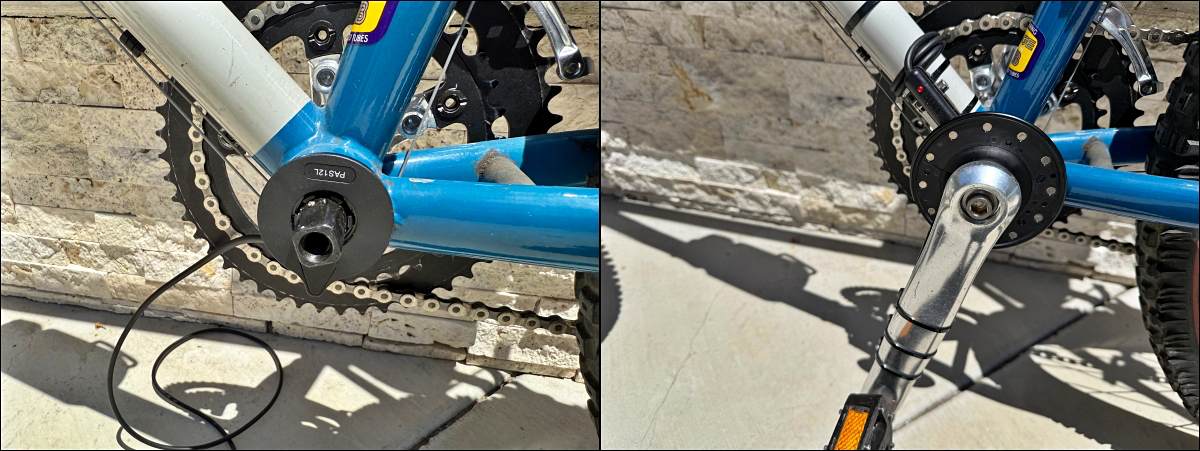
You’ll then set up the pedal sensor. There’s a common model that appears like this. A magnet ring clips round your backside bracket spindle without having to take away the crank after which the arm will get secured to the crank arm with cable ties. Moreover, you’ll mount the sensor to the down tube or seat tube and place it in order that the sensor sits very near the round path of the magnets.
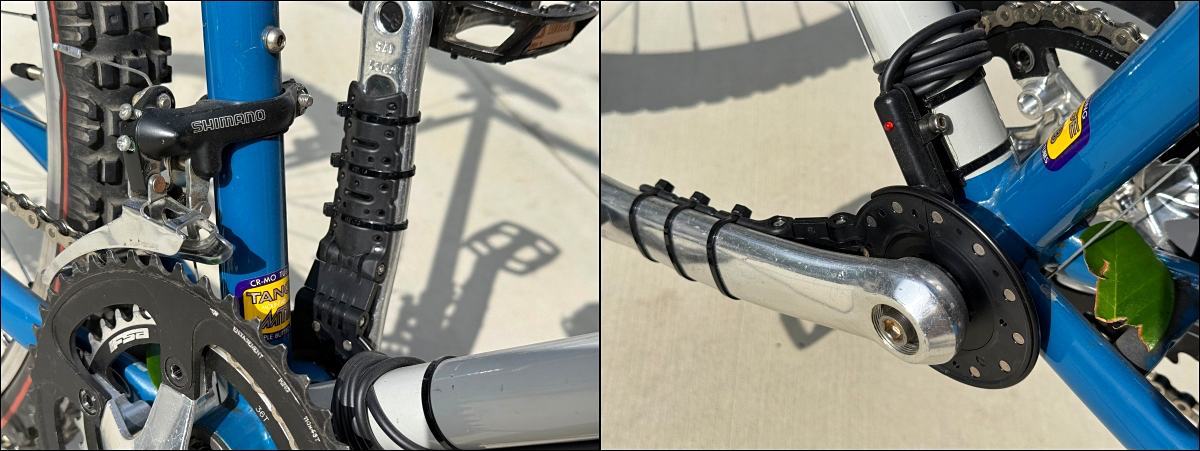
That’s proven on the left under. There’s additionally a second possibility in case you have a appropriate Shimano backside bracket proven on the best under. It’s an all-in-one sensor, however it does require that you just take away the left crank to put in.
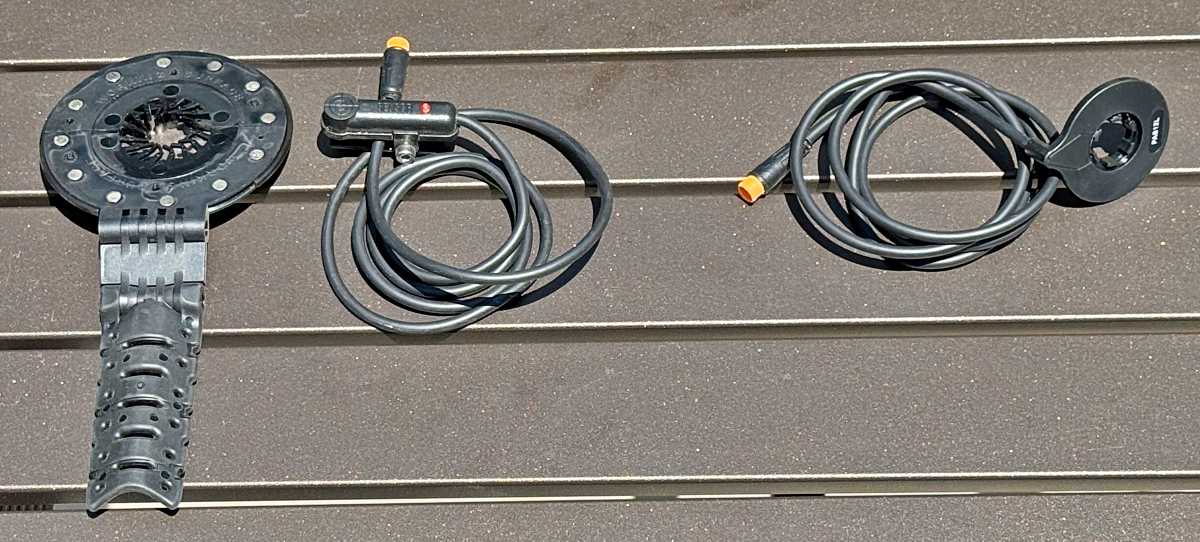
Whereas the circle itself is near the identical measurement, you lose that separate sensor and all the additional cabling that goes with it proven on the best.
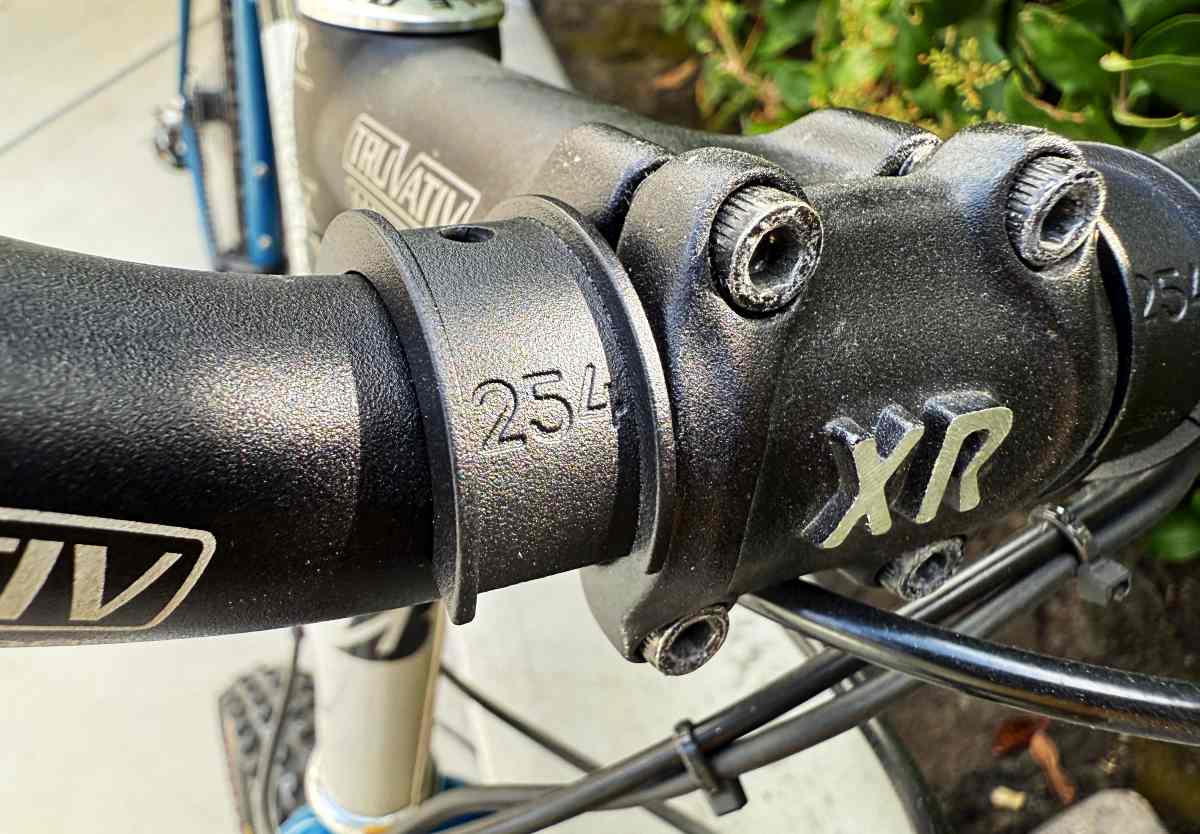
Now you’ll need to set up the mount on the handlebar for which you’ll probably want some handlebar diameter adapters to get the best match. These are included for 3 completely different sizes together with 22.0 and 25.4 that are the commonest sizes. The clamps on the mount are put in with 4 bolt, two that take away down and two that take away up.
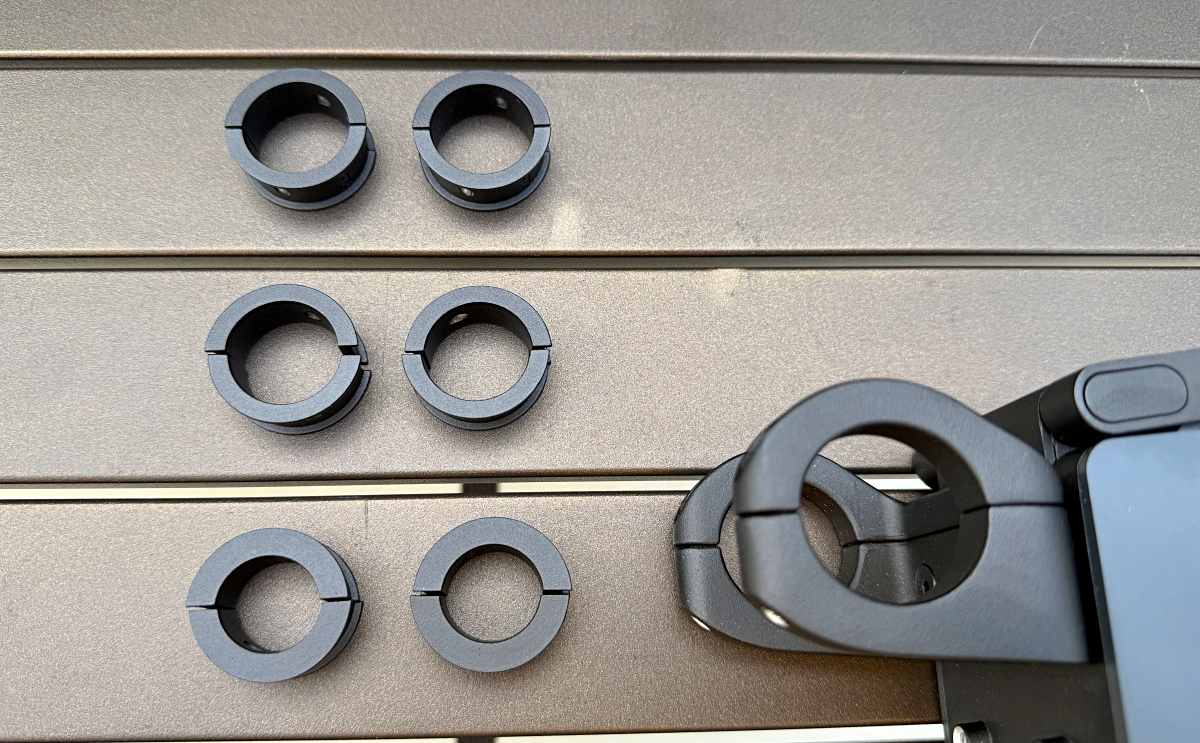
I wanted the 25.4 adapters.
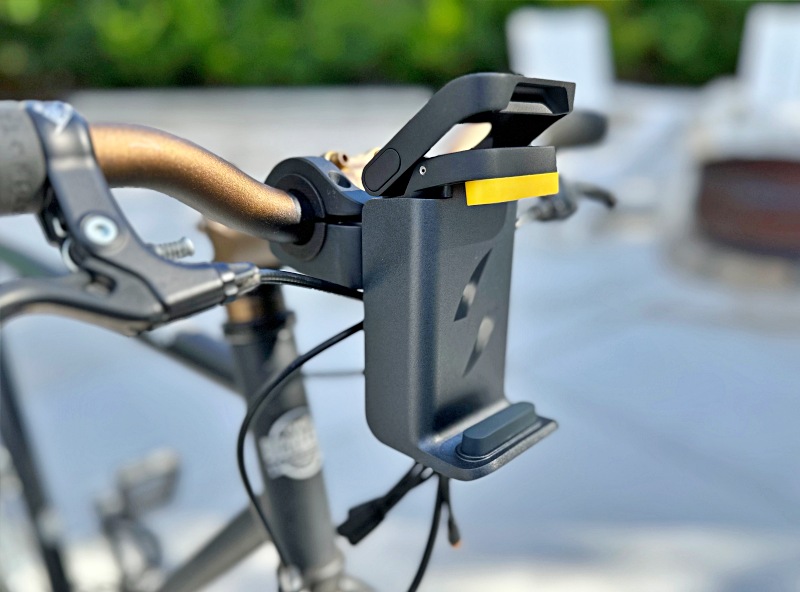
Right here’s a picture of the mount from a earlier set up. Works precisely the identical approach.
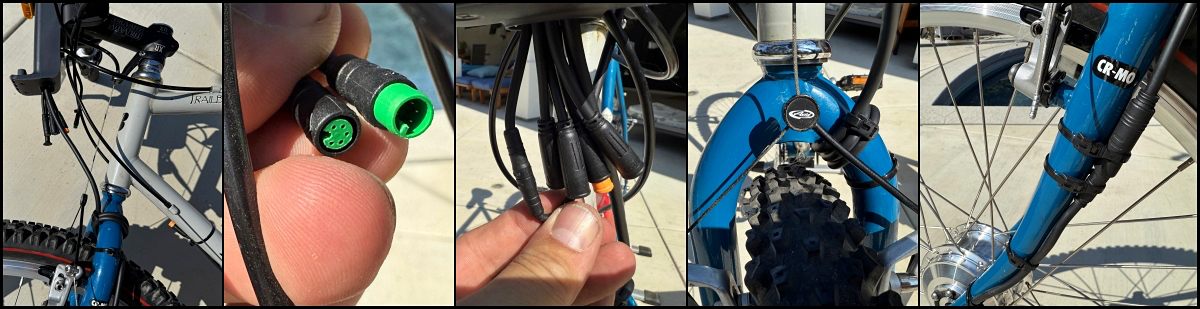
The final a part of any customized set up like that is cable administration. Beneath are a number of examples. From left to proper…
- Mount to motor. Important to maintain the cable safely out of the way in which of the wheel, so wrap creatively and use cable ties. Handlebar and forks flip in unison so there doesn’t have to be an excessive amount of slack in that connection.
- Inexperienced connectors are the mount as much as the show. Line up the keyed protrusion and push until you hear the snap.
- That connection is subsequent to all these others. One yellow is for connecting the pedal sensor whereas the others can be utilized for exterior lights or brake sensors (out there individually)
- That is that motor cable wrapped twice across the fork crown and securely cable tied.
- Additional down the fork leg, a number of cable ties to actually lock down this cable and huge connection
Right here’s the minimal show and its inexperienced connector. It’s one in all my favorites as a consequence of its small measurement and really vivid show. Set up Notice: When putting in, don’t over-tighten the hex screw. The hinge pin is a weak level on this controller design. It’s utilized by quite a lot of completely different bike firms, so simply need to name it out, and I’m not faulting Swytch for that design defect.
Efficiency
First up, let me drop some hyperlinks to the earlier Swytch evaluations the place you may be capable of choose up some suggestions if any of the above felt prefer it was glossing over one thing or lacking a key bit of data. Swytch Go overview | Swytch Air overview | Swytch Common overview
These ought to assist in addition to showcase how lengthy Swytch has been at it. The parts, together with wheels, motors, controllers, and sensors from all these kits, are nonetheless kicking round right here on numerous bikes. Now lets sort out what hasn’t actually modified.
The common method has stayed the identical. That is key as there’s quite a lot of customization to any bike to get it to suit correctly and work properly for you. That’s what makes including an ebike package to a motorbike you have already got and love such a beautiful proposition. It’s additionally why this time round I solely wanted the battery. I requested for a brand new handlebar mount as a result of the Air system I reviewed continues to be on my son’s bike. So on this case I used to be capable of replace the construct from the Go overview. Let’s take a look at that comparability.

On the left is the GO battery and on the best is the MAX+. They’re each successfully 280 Wh batteries. however there’s a reasonably large distinction in measurement. Right here’s what it’s worthwhile to know. The GO battery enclosure can also be hiding the controller, which the MAX+ system strikes into the mount. Regardless that the MAX+ has a built-in mild, these LEDs don’t take up a big quantity of house.
The opposite essential distinction between these two is ease of charging. The GO is definitely charged whereas nonetheless on the bike. Sure, you’ll be able to take away it, however it’s quite a lot of Velcro to undo, and relying in your cables, it won’t be definitely worth the time. The MAX+ however is eliminated with a lever flip letting you allow the bike within the storage whilst you cost conveniently indoors. I feel this additionally makes the bike much less enticing to thieves because it’s clear there’s one thing lacking while you see that vacant cradle with charging contacts.
So about that headlight. It’s a very cool characteristic and it’s fairly vivid. It’s not going to exchange a long-range biking particular mild, however it’s completely going to make you very seen to vehicles in entrance or behind in addition to these approaching from the edges since there are facet LEDs.
There’s additionally a USB-C port on the again of the battery for charging your telephone if wanted. Fairly helpful.
Every little thing else works the identical approach Swytch methods have from the start. Energy on/off from the show, set your help degree and begin pedaling. It couldn’t be a lot less complicated. Modify the help as you go from the show and also you’re good to go. If a throttle is of curiosity, you’ll be able to order a type of to connect to the additional connection factors.
Ultimate ideas
Swytch continues to do what they already do properly whereas innovating the place it’s going to make a distinction. This new MAX+ or MAX++ battery is much and away the best battery system to make use of, AND it has a headlight, AND it will probably cost your telephone. You simply have to deliver a motorbike to the occasion and their package will do the remaining.
What I like concerning the Swytch MAX+ eBike conversion package
- Absolute easiest battery system on the market for ebikes
- Constructed-in headlight is a superb characteristic
- Easy set up to show your favourite bike into an ebike
What must be improved?
- Web site may higher clarify pricing for pre-orders
Value: from $1,300 (£1,000) relying on battery measurement and element choice. Huge reductions (like as much as 50%) will be had by pre-ordering for his or her subsequent manufacturing run, so don’t let that value scare you an excessive amount of.
The place to purchase: Swytchbike
Supply: The pattern of this product was supplied free of charge by Swytch whom didn’t have a last say on the overview and didn’t preview the overview earlier than it was printed.
Take a look at these different bike accent evaluations!
Love this content material? Do not miss new posts!
Enroll for our e-newsletter right now.